Deploy Harbor Registry with Tanzu Packages and expose with Ingress

In the previous post, I described how to install Harbor using Helm to utilize ChartMuseum for running Harbor as a Helm chart repository.

The Harbor registry that comes shipped with TKG 1.5.1 uses Tanzu Packages to deploy Harbor into a TKG cluster. This version of Harbor does not support Helm Charts using ChartMuseum. VMware dropped support for ChartMuseum in TKG and are adopting OCI registries instead. This post describes how to deploy Harbor using the Tanzu Packages (KApp) and use Harbor as an OCI registry that fully supports Helm charts. This is the preferred way to use chart and image registries.

The latest versions as of TKG 1.5.1 packages, February 2022.

PackageVersion
cert-manager1.5.3+vmware.2-tkg.1
contour1.18.2+vmware.1-tkg.1
harbor2.3.3+vmware.1-tkg.1

Or run the following to see the latest available versions.

tanzu package available list harbor.tanzu.vmware.com -A

Pre-requisites

Before installing Harbor, you need to install Cert Manager and Contour. You can follow this other guide here to get started. This post uses Ingress, which requires NSX Advanced Load Balancer (Avi). The previous post will show you how to install these pre-requisites.

Deploy Harbor

Create a configuration file named harbor-data-values.yaml. This file configures the Harbor package. Follow the steps below to obtain a template file.

image_url=$(kubectl -n tanzu-package-repo-global get packages harbor.tanzu.vmware.com.2.3.3+vmware.1-tkg.1 -o jsonpath='{.spec.template.spec.fetch[0].imgpkgBundle.image}')

imgpkg pull -b $image_url -o /tmp/harbor-package-2.3.3+vmware.1-tkg.1

cp /tmp/harbor-package-2.3.3+vmware.1-tkg.1/config/values.yaml harbor-data-values.yaml

Set the mandatory passwords and secrets in the harbor-data-values.yaml file by automatically generating random passwords and secrets:

bash /tmp/harbor-package-2.3.3+vmware.1-tkg.1/config/scripts/generate-passwords.sh harbor-data-values.yaml

Specify other settings in the harbor-data-values.yaml file.

Set the hostname setting to the hostname you want to use to access Harbor via ingress. For example, harbor.yourdomain.com.

To use your own certificates, update the tls.crt, tls.key, and ca.crt settings with the contents of your certificate, key, and CA certificate. The certificate can be signed by a trusted authority or be self-signed. If you leave these blank, Tanzu Kubernetes Grid automatically generates a self-signed certificate.

The format of the tls.crt and tls.key looks like this:

tlsCertificate:
  tls.crt: |
    -----BEGIN CERTIFICATE-----
    ---snipped---
    -----END CERTIFICATE-----
  tls.key: |
    -----BEGIN PRIVATE KEY-----
    ---snipped---
    -----END PRIVATE KEY-----

If you used the generate-passwords.sh script, optionally update the harborAdminPassword with something that is easier to remember.

Optionally update other persistence settings to specify how Harbor stores data.

If you need to store a large quantity of container images in Harbor, set persistence.persistentVolumeClaim.registry.size to a larger number.

If you do not update the storageClass under persistence settings, Harbor uses the cluster’s default storageClass.

Remove all comments in the harbor-data-values.yaml file:

yq -i eval '... comments=""' harbor-data-values.yaml

Install the Harbor package:

tanzu package install harbor \
--package-name harbor.tanzu.vmware.com \
--version 2.3.3+vmware.1-tkg.1 \
--values-file harbor-data-values.yaml \
--namespace my-packages

Obtain the address of the Envoy service load balancer.

kubectl get svc envoy -n tanzu-system-ingress -o jsonpath='{.status.loadBalancer.ingress[0]}'

Update your DNS record to point the hostname to the IP address above.

Update Harbor

Update the Harbor installation in any way, such as updating the TLS certificate, make your changes to the harbor-data-values.yaml file then run the following to update Harbor.

tanzu package installed update harbor --version 2.3.3+vmware.1-tkg.1 --values-file harbor-data-values.yaml --namespace my-packages

Using Harbor as an OCI Registry for Helm Charts

Login to the registry

helm registry login -u admin harbor2.vmwire.com

Package a helm chart if you haven’t got one already packaged

helm package buildachart

Upload a chart to the registry

helm push buildachart-0.1.0.tgz oci://harbor2.vmwire.com/chartrepo

The chart can now be seen in the Harbor UI in the view as where normal Docker images are.

OCI based Harbor

Notice that this is an OCI registry and not a Helm repository that is based on ChartMuseum, thats why you won’t see the ‘Helm Charts’ tab next to the ‘Repositories’ tab.

ChartMuseum based Harbor

Deploy an application with Helm

Let’s deploy the buildachart application, this is a simple nginx application that can use TLS so we have a secure site with HTTPS.

Create a new namespace and the TLS secret for the application. Copy the tls.crt and tls.key files in pem format to $HOME/certs/

# Create a new namespace for cherry
k create ns cherry

# Create a TLS secret with the contents of tls.key and tls.crt in the cherry namespace
kubectl create secret tls cherry-tls --key $HOME/certs/tls.key --cert $HOME/certs/tls.crt -n cherry

Deploy the app using Harbor as the Helm chart repository

helm install buildachart oci://harbor2.vmwire.com/chartrepo/buildachart --version 0.1.0 -n cherry

If you need to install Helm

Follow this link here.

https://helm.sh/docs/topics/registries/

https://opensource.com/article/20/5/helm-charts

https://itnext.io/helm-3-8-0-oci-registry-support-b050ff218911

Advertisement

Scaling TKGm control plane nodes vertically

This post describes how to change TKGm control plane nodes resources, such as vCPU and RAM. In the previous post, I described how to increase resources for a worker node. This process was quite simple and straightforward and initially I had a tough time finding the right resource to edit as the control plane nodes use a different resource to provision the virtual machines.

This post describes how to change TKGm control plane nodes resources, such as vCPU and RAM. In the previous post, I described how to increase resources for a worker node. This process was quite simple and straightforward and initially I had a tough time finding the right resource to edit as the control plane nodes use a different resource to provision the virtual machines.

Step 1. Change to the TKG management cluster context

kubectl config use-context tkg-mgmt

Step 2. List VSphereMachineTemplate

kubectl get VSphereMachineTemplate

Step 4. Make a copy of the current control plane VsphereMachineTemplate to a new file

kubectl get vspheremachinetemplates tkg-ssc-control-plane -o yaml > tkg-ssc-control-plane-new.yaml

Step 5. Edit the new file and make the changes

apiVersion: infrastructure.cluster.x-k8s.io/v1alpha3
kind: VSphereMachineTemplate
metadata:
  annotations:
    kubectl.kubernetes.io/last-applied-configuration: |
      {"apiVersion":"infrastructure.cluster.x-k8s.io/v1alpha3","kind":"VSphereMachineTemplate","metadata":{"annotations":{},"name":"tkg-ssc-control-plane-new","namespace":"default"},"spec":{"template":{"spec":{"cloneMode":"fullClone","datacenter":"/home.local","datastore":"lun01","diskGiB":40,"folder":"/home.local/vm/tkg-vsphere-shared-services","memoryMiB":4096,"network":{"devices":[{"dhcp4":true,"networkName":"/home.local/network/tkg-mgmt"}]},"numCPUs":2,"resourcePool":"/home.local/host/cluster/Resources/tkg-vsphere-shared-services","server":"vcenter.vmwire.com","storagePolicyName":"","template":"/home.local/vm/Templates/ubuntu-2004-kube-v1.21.2+vmware.1"}}}}
  creationTimestamp: "2021-11-11T07:33:37Z"
  generation: 1
  name: tkg-ssc-control-plane-new
  namespace: default
  ownerReferences:
  - apiVersion: cluster.x-k8s.io/v1alpha3
    kind: Cluster
    name: tkg-ssc
    uid: 9bd41852-38df-4d12-bb81-7b2bb35fdfa5
  resourceVersion: "198053"
  uid: 09b62ee7-6532-4bf6-8939-ef70a28bc65f
spec:
  template:
    spec:
      cloneMode: fullClone
      datacenter: /home.local
      datastore: lun01
      diskGiB: 40
      folder: /home.local/vm/tkg-vsphere-shared-services
      memoryMiB: 4096
      network:
        devices:
        - dhcp4: true
          networkName: /home.local/network/tkg-mgmt
      numCPUs: 2
      resourcePool: /home.local/host/cluster/Resources/tkg-vsphere-shared-services
      server: vcenter.vmwire.com
      storagePolicyName: ""
      template: /home.local/vm/Templates/ubuntu-2004-kube-v1.21.2+vmware.1

I made changes to lines 6, 9, 26 and 31. I want to reduce the vCPU and RAM of the control plane nodes as these were over-provisioned by mistake.

Step 6. Apply the new VsphereMachineTemplate

kubectl apply -f tkg-ssc-control-plane-new.yaml

Step 7. List all KubeadmControlPlane

kubectl get KubeadmControlPlane
NAME                    INITIALIZED   API SERVER AVAILABLE   VERSION            REPLICAS   READY   UPDATED   UNAVAILABLE
tkg-ssc-control-plane   true          true                   v1.21.2+vmware.1   1          1       1

Step 8. Edit the KubeadmControlPlane for the cluster

kubectl edit KubeadmControlPlane tkg-ssc-control-plane
# Please edit the object below. Lines beginning with a '#' will be ignored,
# and an empty file will abort the edit. If an error occurs while saving this file will be
# reopened with the relevant failures.
#
apiVersion: controlplane.cluster.x-k8s.io/v1alpha3
kind: KubeadmControlPlane
metadata:
  annotations:
    kubectl.kubernetes.io/last-applied-configuration: |
      {"apiVersion":"controlplane.cluster.x-k8s.io/v1alpha3","kind":"KubeadmControlPlane","metadata":{"annotations":{},"name":"tkg-ssc-control-plane","namespace":"default"},"spec":{"infrastructureTemplate":{"apiVersion":"infrastructure.cluster.x-k8s.io/v1alpha3","kind":"VSphereMachineTemplate","name":"tkg-ssc-control-plane"},"kubeadmConfigSpec":{"clusterConfiguration":{"apiServer":{"extraArgs":{"audit-log-maxage":"30","audit-log-maxbackup":"10","audit-log-maxsize":"100","audit-log-path":"/var/log/kubernetes/audit.log","audit-policy-file":"/etc/kubernetes/audit-policy.yaml","cloud-provider":"external","tls-cipher-suites":"TLS_ECDHE_ECDSA_WITH_AES_128_GCM_SHA256,TLS_ECDHE_RSA_WITH_AES_128_GCM_SHA256,TLS_ECDHE_ECDSA_WITH_CHACHA20_POLY1305,TLS_ECDHE_RSA_WITH_AES_256_GCM_SHA384,TLS_ECDHE_RSA_WITH_CHACHA20_POLY1305,TLS_ECDHE_ECDSA_WITH_AES_256_GCM_SHA384"},"extraVolumes":[{"hostPath":"/etc/kubernetes/audit-policy.yaml","mountPath":"/etc/kubernetes/audit-policy.yaml","name":"audit-policy"},{"hostPath":"/var/log/kubernetes","mountPath":"/var/log/kubernetes","name":"audit-logs"}],"timeoutForControlPlane":"8m0s"},"controllerManager":{"extraArgs":{"cloud-provider":"external","tls-cipher-suites":"TLS_ECDHE_ECDSA_WITH_AES_128_GCM_SHA256,TLS_ECDHE_RSA_WITH_AES_128_GCM_SHA256,TLS_ECDHE_ECDSA_WITH_CHACHA20_POLY1305,TLS_ECDHE_RSA_WITH_AES_256_GCM_SHA384,TLS_ECDHE_RSA_WITH_CHACHA20_POLY1305,TLS_ECDHE_ECDSA_WITH_AES_256_GCM_SHA384"}},"dns":{"imageRepository":"projects.registry.vmware.com/tkg","imageTag":"v1.8.0_vmware.5","type":"CoreDNS"},"etcd":{"local":{"dataDir":"/var/lib/etcd","extraArgs":{"cipher-suites":"TLS_ECDHE_ECDSA_WITH_AES_128_GCM_SHA256,TLS_ECDHE_RSA_WITH_AES_128_GCM_SHA256,TLS_ECDHE_ECDSA_WITH_CHACHA20_POLY1305,TLS_ECDHE_RSA_WITH_AES_256_GCM_SHA384,TLS_ECDHE_RSA_WITH_CHACHA20_POLY1305,TLS_ECDHE_ECDSA_WITH_AES_256_GCM_SHA384"},"imageRepository":"projects.registry.vmware.com/tkg","imageTag":"v3.4.13_vmware.15"}},"imageRepository":"projects.registry.vmware.com/tkg","scheduler":{"extraArgs":{"tls-cipher-suites":"TLS_ECDHE_ECDSA_WITH_AES_128_GCM_SHA256,TLS_ECDHE_RSA_WITH_AES_128_GCM_SHA256,TLS_ECDHE_ECDSA_WITH_CHACHA20_POLY1305,TLS_ECDHE_RSA_WITH_AES_256_GCM_SHA384,TLS_ECDHE_RSA_WITH_CHACHA20_POLY1305,TLS_ECDHE_ECDSA_WITH_AES_256_GCM_SHA384"}}},"files":[{"content":"---snip---","encoding":"base64","owner":"root:root","path":"/etc/kubernetes/audit-policy.yaml","permissions":"0600"}],"initConfiguration":{"nodeRegistration":{"criSocket":"/var/run/containerd/containerd.sock","kubeletExtraArgs":{"cloud-provider":"external","tls-cipher-suites":"TLS_ECDHE_ECDSA_WITH_AES_128_GCM_SHA256,TLS_ECDHE_RSA_WITH_AES_128_GCM_SHA256,TLS_ECDHE_ECDSA_WITH_CHACHA20_POLY1305,TLS_ECDHE_RSA_WITH_AES_256_GCM_SHA384,TLS_ECDHE_RSA_WITH_CHACHA20_POLY1305,TLS_ECDHE_ECDSA_WITH_AES_256_GCM_SHA384"},"name":"{{ ds.meta_data.hostname }}"}},"joinConfiguration":{"nodeRegistration":{"criSocket":"/var/run/containerd/containerd.sock","kubeletExtraArgs":{"cloud-provider":"external","tls-cipher-suites":"TLS_ECDHE_ECDSA_WITH_AES_128_GCM_SHA256,TLS_ECDHE_RSA_WITH_AES_128_GCM_SHA256,TLS_ECDHE_ECDSA_WITH_CHACHA20_POLY1305,TLS_ECDHE_RSA_WITH_AES_256_GCM_SHA384,TLS_ECDHE_RSA_WITH_CHACHA20_POLY1305,TLS_ECDHE_ECDSA_WITH_AES_256_GCM_SHA384"},"name":"{{ ds.meta_data.hostname }}"}},"preKubeadmCommands":["hostname \"{{ ds.meta_data.hostname }}\"","echo \"::1         ipv6-localhost ipv6-loopback\" \u003e/etc/hosts","echo \"127.0.0.1   localhost\" \u003e\u003e/etc/hosts","echo \"127.0.0.1   {{ ds.meta_data.hostname }}\" \u003e\u003e/etc/hosts","echo \"{{ ds.meta_data.hostname }}\" \u003e/etc/hostname"],"useExperimentalRetryJoin":true,"users":[{"name":"capv","sshAuthorizedKeys":["---snip---"],"sudo":"ALL=(ALL) NOPASSWD:ALL"}]},"replicas":1,"version":"v1.21.2+vmware.1"}}
  creationTimestamp: "2021-11-11T07:33:37Z"
  finalizers:
  - kubeadm.controlplane.cluster.x-k8s.io
  generation: 2
  labels:
    cluster.x-k8s.io/cluster-name: tkg-ssc
  name: tkg-ssc-control-plane
  namespace: default
  ownerReferences:
  - apiVersion: cluster.x-k8s.io/v1alpha3
    blockOwnerDeletion: true
    controller: true
    kind: Cluster
    name: tkg-ssc
    uid: 9bd41852-38df-4d12-bb81-7b2bb35fdfa5
  resourceVersion: "5787872"
  uid: 1532ce9b-2d7e-45f7-b8ab-2d5bd4fe6b7f
spec:
  infrastructureTemplate:
    apiVersion: infrastructure.cluster.x-k8s.io/v1alpha3
    kind: VSphereMachineTemplate
    name: tkg-ssc-control-plane-new
    namespace: default
  kubeadmConfigSpec:
    clusterConfiguration:
      apiServer:
        extraArgs:
          audit-log-maxage: "30"
          audit-log-maxbackup: "10"
          audit-log-maxsize: "100"
          audit-log-path: /var/log/kubernetes/audit.log
          audit-policy-file: /etc/kubernetes/audit-policy.yaml
          cloud-provider: external
tls-cipher-suites: TLS_ECDHE_ECDSA_WITH_AES_128_GCM_SHA256,TLS_ECDHE_RSA_WITH_AES_128_GCM_SHA256,TLS_ECDHE_ECDSA_WITH_CHACHA20_POLY1305,TLS_ECDHE_RSA_WITH_AES_256_GCM_SHA384,TLS_ECDHE_RSA_WITH_CHACHA20_POLY1305,TLS_ECDHE_ECDSA_WITH_AES_256_GCM_SHA384
      dns:
        imageRepository: projects.registry.vmware.com/tkg
        imageTag: v1.8.0_vmware.5
        type: CoreDNS
      etcd:
        local:
          dataDir: /var/lib/etcd
          extraArgs:
            cipher-suites: TLS_ECDHE_ECDSA_WITH_AES_128_GCM_SHA256,TLS_ECDHE_RSA_WITH_AES_128_GCM_SHA256,TLS_ECDHE_ECDSA_WITH_CHACHA20_POLY1305,TLS_ECDHE_RSA_WITH_AES_256_GCM_SHA384,TLS_ECDHE_RSA_WITH_CHACHA20_POLY1305,TLS_ECDHE_ECDSA_WITH_AES_256_GCM_SHA384
          imageRepository: projects.registry.vmware.com/tkg
          imageTag: v3.4.13_vmware.15
      imageRepository: projects.registry.vmware.com/tkg
      networking: {}
      scheduler:
        extraArgs:
          tls-cipher-suites: TLS_ECDHE_ECDSA_WITH_AES_128_GCM_SHA256,TLS_ECDHE_RSA_WITH_AES_128_GCM_SHA256,TLS_ECDHE_ECDSA_WITH_CHACHA20_POLY1305,TLS_ECDHE_RSA_WITH_AES_256_GCM_SHA384,TLS_ECDHE_RSA_WITH_CHACHA20_POLY1305,TLS_ECDHE_ECDSA_WITH_AES_256_GCM_SHA384
    files:
    - content: ---snip---
      encoding: base64
      owner: root:root
      path: /etc/kubernetes/audit-policy.yaml
      permissions: "0600"
    initConfiguration:
      localAPIEndpoint:
        advertiseAddress: ""
        bindPort: 0
      nodeRegistration:
        criSocket: /var/run/containerd/containerd.sock
        kubeletExtraArgs:
          cloud-provider: external
          tls-cipher-suites: TLS_ECDHE_ECDSA_WITH_AES_128_GCM_SHA256,TLS_ECDHE_RSA_WITH_AES_128_GCM_SHA256,TLS_ECDHE_ECDSA_WITH_CHACHA20_POLY1305,TLS_ECDHE_RSA_WITH_AES_256_GCM_SHA384,TLS_ECDHE_RSA_WITH_CHACHA20_POLY1305,TLS_ECDHE_ECDSA_WITH_AES_256_GCM_SHA384
        name: '{{ ds.meta_data.hostname }}'
    joinConfiguration:
      discovery: {}
      nodeRegistration:
        criSocket: /var/run/containerd/containerd.sock
        kubeletExtraArgs:
          cloud-provider: external
          tls-cipher-suites: TLS_ECDHE_ECDSA_WITH_AES_128_GCM_SHA256,TLS_ECDHE_RSA_WITH_AES_128_GCM_SHA256,TLS_ECDHE_ECDSA_WITH_CHACHA20_POLY1305,TLS_ECDHE_RSA_WITH_AES_256_GCM_SHA384,TLS_ECDHE_RSA_WITH_CHACHA20_POLY1305,TLS_ECDHE_ECDSA_WITH_AES_256_GCM_SHA384
        name: '{{ ds.meta_data.hostname }}'
    preKubeadmCommands:
    - hostname "{{ ds.meta_data.hostname }}"
    - echo "::1         ipv6-localhost ipv6-loopback" >/etc/hosts
    - echo "127.0.0.1   localhost" >>/etc/hosts
    - echo "127.0.0.1   {{ ds.meta_data.hostname }}" >>/etc/hosts
    - echo "{{ ds.meta_data.hostname }}" >/etc/hostname
    useExperimentalRetryJoin: true
    users:
    - name: capv
      sshAuthorizedKeys:
      - ssh-rsa ---snip---
      sudo: ALL=(ALL) NOPASSWD:ALL
  replicas: 1
  rolloutStrategy:
    rollingUpdate:
      maxSurge: 1
    type: RollingUpdate
  version: v1.21.2+vmware.1
status:
  conditions:
  - lastTransitionTime: "2021-11-22T14:40:53Z"
    status: "True"
    type: Ready
  - lastTransitionTime: "2021-11-11T07:35:55Z"
    status: "True"
    type: Available
  - lastTransitionTime: "2021-11-11T07:33:39Z"
    status: "True"
    type: CertificatesAvailable
  - lastTransitionTime: "2021-11-22T14:39:32Z"
    status: "True"
    type: ControlPlaneComponentsHealthy
  - lastTransitionTime: "2021-11-22T14:40:53Z"
    status: "True"
    type: EtcdClusterHealthyCondition
  - lastTransitionTime: "2021-11-22T14:40:53Z"
    status: "True"
    type: MachinesReady
  - lastTransitionTime: "2021-11-22T14:39:57Z"
    status: "True"
    type: MachinesSpecUpToDate
  - lastTransitionTime: "2021-11-22T14:40:53Z"
    status: "True"
    type: Resized
  initialized: true
  observedGeneration: 2
  ready: true
  readyReplicas: 1
  replicas: 1
  selector: cluster.x-k8s.io/cluster-name=tkg-ssc,cluster.x-k8s.io/control-plane
  updatedReplicas: 1

Change line 32, to use the new VsphereMachineTemplate called tkg-ssc-control-plane-new. Once you save and quit with :wq! the control plane nodes will be re-deployed.

Scaling up a TKGm cluster vertically

It is very simple to scale-out a TKGm cluster. The command

tanzu cluster scale cluster_name --controlplane-machine-count 5 --worker-machine-count 10

will easily do this for you, this is known as horizontal scale-out. But have you thought of how to scale-up control plane or worker nodes with more CPU or memory?

This post discusses how you can scale up a TKGm worker node, tl;dr how to increase or decrease worker node CPU, RAM, disk.

Getting started

It is not a simple process to scale-up as it is to scale-out. Follow the steps below to scale-up your TKGm cluster.

Step 1.

Run the following command to obtain the list of vSphere machine templates that TKGm uses to deploy control plane and worker nodes.

kubectl get vspheremachinetemplate
NAME                             AGE
tkg-ssc-control-plane            3d1h
tkg-ssc-worker                   3d1h
tkg-workload-01-control-plane    3d
tkg-workload-01-worker           3d

You can see that there are four machine templates.

Lets say we want to increase the size of the worker nodes in the tkg-workload-01 cluster.

Lets describe the tkg-workload-01-worker machine template.

kubectl describe vspheremachinetemplate tkg-workload-01-worker
Name:         tkg-workload-01-worker
Namespace:    default
Labels:       <none>
Annotations:  <none>
API Version:  infrastructure.cluster.x-k8s.io/v1alpha3
Kind:         VSphereMachineTemplate
Metadata:
  Creation Timestamp:  2021-10-29T14:11:25Z
  Generation:          1
  Managed Fields:
    API Version:  infrastructure.cluster.x-k8s.io/v1alpha3
    Fields Type:  FieldsV1
    fieldsV1:
      f:metadata:
        f:annotations:
          .:
          f:kubectl.kubernetes.io/last-applied-configuration:
      f:spec:
        .:
        f:template:
          .:
          f:spec:
            .:
            f:cloneMode:
            f:datacenter:
            f:datastore:
            f:diskGiB:
            f:folder:
            f:memoryMiB:
            f:network:
              .:
              f:devices:
            f:numCPUs:
            f:resourcePool:
            f:server:
            f:storagePolicyName:
            f:template:
    Manager:      kubectl-client-side-apply
    Operation:    Update
    Time:         2021-10-29T14:11:25Z
    API Version:  infrastructure.cluster.x-k8s.io/v1alpha3
    Fields Type:  FieldsV1
    fieldsV1:
      f:metadata:
        f:ownerReferences:
          .:
          k:{"uid":"be507594-0c05-4d30-8ed6-56811733df23"}:
            .:
            f:apiVersion:
            f:kind:
            f:name:
            f:uid:
    Manager:    manager
    Operation:  Update
    Time:       2021-10-29T14:11:25Z
  Owner References:
    API Version:     cluster.x-k8s.io/v1alpha3
    Kind:            Cluster
    Name:            tkg-workload-01
    UID:             be507594-0c05-4d30-8ed6-56811733df23
  Resource Version:  45814
  UID:               fc1f3d9f-078f-4282-b93f-e46593a760a5
Spec:
  Template:
    Spec:
      Clone Mode:   fullClone
      Datacenter:   /TanzuPOC
      Datastore:    tanzu_ssd_02
      Disk Gi B:    40
      Folder:       /TanzuPOC/vm/tkg-vsphere-workload
      Memory Mi B:  16384
      Network:
        Devices:
          dhcp4:            true
          Network Name:     /TanzuPOC/network/TKG-wkld
      Num CP Us:            4
      Resource Pool:        /TanzuPOC/host/Workload Cluster 1/Resources/tkg-vsphere-workload
      Server:               vcenter.vmwire.com
      Storage Policy Name:
      Template:             /TanzuPOC/vm/ubuntu-2004-kube-v1.21.2+vmware.1
Events:                     <none>

You can see that this machine template has 16GB of RAM and 4 vCPUs. Lets say we want to increase workers to 120GB of RAM and 24 vCPUs, how would we do this?

Step 2.

We need to clone the currently in use machine template into a new one and then apply it.

kubectl get vspheremachinetemplate tkg-workload-01-worker -o yaml > new-machine-template.yaml

Step 3.

Now that we have exported the current machine template into a new yaml file, we can edit it to suit our needs. Edi the file and make the changes to the file.

apiVersion: infrastructure.cluster.x-k8s.io/v1alpha3
kind: VSphereMachineTemplate
metadata:
  annotations:
    kubectl.kubernetes.io/last-applied-configuration: |
      {"apiVersion":"infrastructure.cluster.x-k8s.io/v1alpha3","kind":"VSphereMachineTemplate","metadata":{"annotations":{},"creationTimestamp":"2021-10-29T14:11:25Z","generation":1,"name":"tkg-workload-01-worker-scale","namespace":"default","ownerReferences":[{"apiVersion":"cluster.x-k8s.io/v1alpha3","kind":"Cluster","name":"tkg-workload-01","uid":"be507594-0c05-4d30-8ed6-56811733df23"}],"resourceVersion":"45814","uid":"fc1f3d9f-078f-4282-b93f-e46593a760a5"},"spec":{"template":{"spec":{"cloneMode":"fullClone","datacenter":"/TanzuPOC","datastore":"tanzu_ssd_02","diskGiB":40,"folder":"/TanzuPOC/vm/tkg-vsphere-workload","memoryMiB":122880,"network":{"devices":[{"dhcp4":true,"networkName":"/TanzuPOC/network/TKG-wkld"}]},"numCPUs":24,"resourcePool":"/TanzuPOC/host/Workload Cluster 1/Resources/tkg-vsphere-workload","server":"tanzuvcenter01.ete.ka.sw.ericsson.se","storagePolicyName":"","template":"/TanzuPOC/vm/ubuntu-2004-kube-v1.21.2+vmware.1"}}}}
  creationTimestamp: "2021-11-01T11:18:08Z"
  generation: 1
  name: tkg-workload-01-worker-scale
  namespace: default
  ownerReferences:
  - apiVersion: cluster.x-k8s.io/v1alpha3
    kind: Cluster
    name: tkg-workload-01
    uid: be507594-0c05-4d30-8ed6-56811733df23
  resourceVersion: "1590589"
  uid: 8697ec4c-7118-4ff0-b4cd-a456cb090f58
spec:
  template:
    spec:
      cloneMode: fullClone
      datacenter: /TanzuPOC
      datastore: tanzu_ssd_02
      diskGiB: 40
      folder: /TanzuPOC/vm/tkg-vsphere-workload
      memoryMiB: 122880
      network:
        devices:
        - dhcp4: true
          networkName: /TanzuPOC/network/TKG-wkld
      numCPUs: 24
      resourcePool: /TanzuPOC/host/Workload Cluster 1/Resources/tkg-vsphere-workload
      server: vcenter.vmwire.com
      storagePolicyName: ""
      template: /TanzuPOC/vm/ubuntu-2004-kube-v1.21.2+vmware.1

Change lines 6 and 9 by appending a new name to the machine template, you’ll notice that the original name was tkg-workload-01-worker, I appended “scale” to it so the new name of this new machine template is tkg-workload-01-worker-scale.

Step 4.

We can now apply the new machine template with this command

kubectl apply –f new-machine-template.yaml

We can check that the new machine template exists by running this command

kubectl get vspheremachinetemplate
NAME                             AGE
tkg-ssc-control-plane            3d1h
tkg-ssc-worker                   3d1h
tkg-workload-01-control-plane    3d
tkg-workload-01-worker           3d
tkg-workload-01-worker-scale     10s

Step 5.

Now we can apply the new machine template to our cluster.

Before doing that, we need to obtain the machine deployment details for the tkg-workload-01 cluster, we can get this information by running these commands

kubectl get MachineDeployment
NAME                   PHASE     REPLICAS   READY   UPDATED   UNAVAILABLE
tkg-ssc-md-0           Running   3          3       3
tkg-workload-01-md-0   Running   4          4       4

We are interested in the tkg-workload-01-md-0 machine deployment so lets describe it.

kubectl describe MachineDeployment tkg-workload-01-md-0
Name:         tkg-workload-01-md-0
Namespace:    default
Labels:       cluster.x-k8s.io/cluster-name=tkg-workload-01
Annotations:  machinedeployment.clusters.x-k8s.io/revision: 3
API Version:  cluster.x-k8s.io/v1alpha3
Kind:         MachineDeployment
Metadata:
  Creation Timestamp:  2021-10-29T14:11:25Z
  Generation:          7
  Managed Fields:
    API Version:  cluster.x-k8s.io/v1alpha3
    Fields Type:  FieldsV1
    fieldsV1:
      f:metadata:
        f:annotations:
          .:
          f:kubectl.kubernetes.io/last-applied-configuration:
        f:labels:
          .:
          f:cluster.x-k8s.io/cluster-name:
      f:spec:
        .:
        f:clusterName:
        f:selector:
          .:
          f:matchLabels:
            .:
            f:cluster.x-k8s.io/cluster-name:
        f:template:
          .:
          f:metadata:
            .:
            f:labels:
              .:
              f:cluster.x-k8s.io/cluster-name:
              f:node-pool:
          f:spec:
            .:
            f:bootstrap:
              .:
              f:configRef:
                .:
                f:apiVersion:
                f:kind:
                f:name:
            f:clusterName:
            f:infrastructureRef:
              .:
              f:apiVersion:
              f:kind:
            f:version:
    Manager:      kubectl-client-side-apply
    Operation:    Update
    Time:         2021-10-29T14:11:25Z
    API Version:  cluster.x-k8s.io/v1alpha3
    Fields Type:  FieldsV1
    fieldsV1:
      f:spec:
        f:template:
          f:spec:
            f:infrastructureRef:
              f:name:
    Manager:      kubectl-edit
    Operation:    Update
    Time:         2021-11-01T11:25:51Z
    API Version:  cluster.x-k8s.io/v1alpha3
    Fields Type:  FieldsV1
    fieldsV1:
      f:spec:
        f:replicas:
    Manager:      tanzu-plugin-cluster
    Operation:    Update
    Time:         2021-11-01T12:33:35Z
    API Version:  cluster.x-k8s.io/v1alpha3
    Fields Type:  FieldsV1
    fieldsV1:
      f:metadata:
        f:annotations:
          f:machinedeployment.clusters.x-k8s.io/revision:
        f:ownerReferences:
          .:
          k:{"uid":"be507594-0c05-4d30-8ed6-56811733df23"}:
            .:
            f:apiVersion:
            f:kind:
            f:name:
            f:uid:
      f:status:
        .:
        f:availableReplicas:
        f:observedGeneration:
        f:phase:
        f:readyReplicas:
        f:replicas:
        f:selector:
        f:updatedReplicas:
    Manager:    manager
    Operation:  Update
    Time:       2021-11-01T14:30:38Z
  Owner References:
    API Version:     cluster.x-k8s.io/v1alpha3
    Kind:            Cluster
    Name:            tkg-workload-01
    UID:             be507594-0c05-4d30-8ed6-56811733df23
  Resource Version:  1665423
  UID:               5148e564-cf66-4581-8941-c3024c58967e
Spec:
  Cluster Name:               tkg-workload-01
  Min Ready Seconds:          0
  Progress Deadline Seconds:  600
  Replicas:                   4
  Revision History Limit:     1
  Selector:
    Match Labels:
      cluster.x-k8s.io/cluster-name:  tkg-workload-01
  Strategy:
    Rolling Update:
      Max Surge:        1
      Max Unavailable:  0
    Type:               RollingUpdate
  Template:
    Metadata:
      Labels:
        cluster.x-k8s.io/cluster-name:  tkg-workload-01
        Node - Pool:                    tkg-workload-01-worker-pool
    Spec:
      Bootstrap:
        Config Ref:
          API Version:  bootstrap.cluster.x-k8s.io/v1alpha3
          Kind:         KubeadmConfigTemplate
          Name:         tkg-workload-01-md-0
      Cluster Name:     tkg-workload-01
      Infrastructure Ref:
        API Version:  infrastructure.cluster.x-k8s.io/v1alpha3
        Kind:         VSphereMachineTemplate
        Name:         tkg-workload-01-worker
      Version:        v1.21.2+vmware.1
Status:
  Available Replicas:   4
  Observed Generation:  7
  Phase:                Running
  Ready Replicas:       4
  Replicas:             4
  Selector:             cluster.x-k8s.io/cluster-name=tkg-workload-01
  Updated Replicas:     4
Events:
  Type    Reason           Age                 From                          Message
  ----    ------           ----                ----                          -------
  Normal  SuccessfulScale  90s (x2 over 114m)  machinedeployment-controller  Scaled down MachineSet "tkg-workload-01-md-0-647645ddcd" to 4

The line that we are interested in is line 38. This is the current machine template that this cluster is using, you’ll notice that it is of course using the original spec, what we need to do is change it to the new spec that we created earlier. If you remember, we named that one tkg-workload-01-worker-scale.

Step 6.

kubectl edit MachineDeployment tkg-workload-01-md-0
# Please edit the object below. Lines beginning with a '#' will be ignored,
# and an empty file will abort the edit. If an error occurs while saving this file will be
# reopened with the relevant failures.
#
apiVersion: cluster.x-k8s.io/v1alpha3
kind: MachineDeployment
metadata:
  annotations:
    kubectl.kubernetes.io/last-applied-configuration: |
      {"apiVersion":"cluster.x-k8s.io/v1alpha3","kind":"MachineDeployment","metadata":{"annotations":{},"labels":{"cluster.x-k8s.io/cluster-name":"tkg-workload-01"},"name":"tkg-workload-01-md-0","namespace":"default"},"spec":{"clusterName":"tkg-workload-01","replicas":4,"selector":{"matchLabels":{"cluster.x-k8s.io/cluster-name":"tkg-workload-01"}},"template":{"metadata":{"labels":{"cluster.x-k8s.io/cluster-name":"tkg-workload-01","node-pool":"tkg-workload-01-worker-pool"}},"spec":{"bootstrap":{"configRef":{"apiVersion":"bootstrap.cluster.x-k8s.io/v1alpha3","kind":"KubeadmConfigTemplate","name":"tkg-workload-01-md-0"}},"clusterName":"tkg-workload-01","infrastructureRef":{"apiVersion":"infrastructure.cluster.x-k8s.io/v1alpha3","kind":"VSphereMachineTemplate","name":"tkg-workload-01-worker"},"version":"v1.21.2+vmware.1"}}}}
    machinedeployment.clusters.x-k8s.io/revision: "3"
  creationTimestamp: "2021-10-29T14:11:25Z"
  generation: 7
  labels:
    cluster.x-k8s.io/cluster-name: tkg-workload-01
  name: tkg-workload-01-md-0
  namespace: default
  ownerReferences:
  - apiVersion: cluster.x-k8s.io/v1alpha3
    kind: Cluster
    name: tkg-workload-01
    uid: be507594-0c05-4d30-8ed6-56811733df23
  resourceVersion: "1665423"
  uid: 5148e564-cf66-4581-8941-c3024c58967e
spec:
  clusterName: tkg-workload-01
  minReadySeconds: 0
  progressDeadlineSeconds: 600
  replicas: 4
  revisionHistoryLimit: 1
  selector:
    matchLabels:
      cluster.x-k8s.io/cluster-name: tkg-workload-01
  strategy:
    rollingUpdate:
      maxSurge: 1
      maxUnavailable: 0
    type: RollingUpdate
  template:
    metadata:
      labels:
        cluster.x-k8s.io/cluster-name: tkg-workload-01
        node-pool: tkg-workload-01-worker-pool
    spec:
      bootstrap:
        configRef:
          apiVersion: bootstrap.cluster.x-k8s.io/v1alpha3
          kind: KubeadmConfigTemplate
          name: tkg-workload-01-md-0
      clusterName: tkg-workload-01
      infrastructureRef:
        apiVersion: infrastructure.cluster.x-k8s.io/v1alpha3
        kind: VSphereMachineTemplate
        name: tkg-workload-01-worker-scale
      version: v1.21.2+vmware.1
status:
  availableReplicas: 4
  observedGeneration: 7
  phase: Running
  readyReplicas: 4
  replicas: 4
  selector: cluster.x-k8s.io/cluster-name=tkg-workload-01
  updatedReplicas: 4

The line that we are interested in is line 54. We need to change the machine template from that old one to our new one.

Lets make that change by going down to line 54 and adding “-scale” to the end of that line. Once you save and quit using “:wq!”. Kubernetes will make do a rolling update of your TKGm cluster for you.

Finishing off

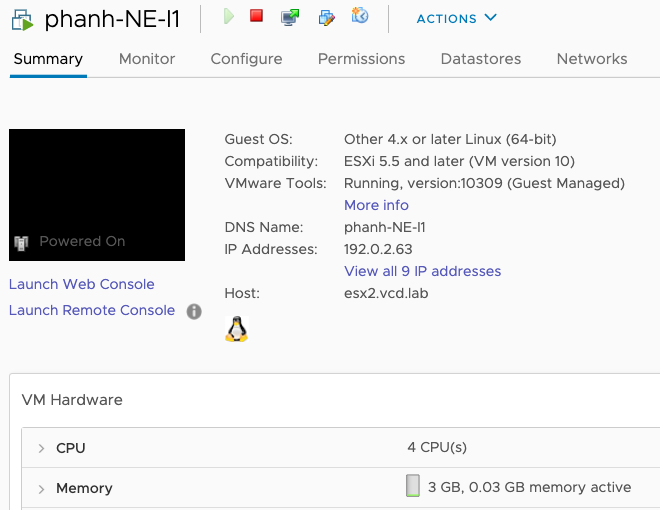
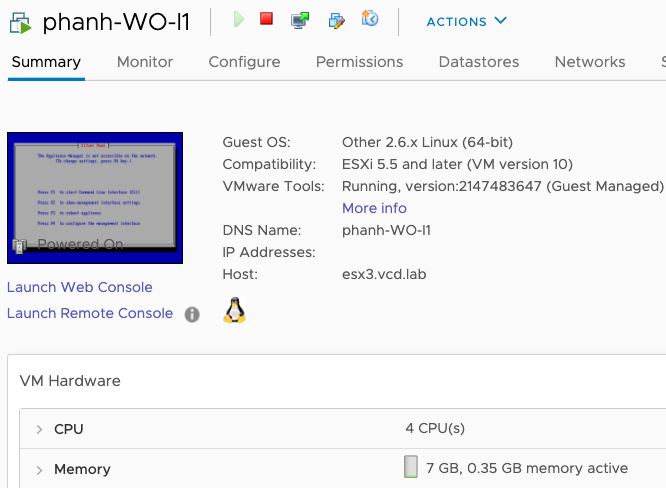
Once the rolling update is done, you can check vSphere Web Client for new VMs being cloned and old ones being deleted. You can also run the command below to see the status of the rolling updates.

kubectl get MachineDeployment

You’ll then see that your new worker nodes have been resized without interrupting any of the running pods in the cluster.

Reducing HCX on-premises appliances resources

When HCX is deployed there are three appliances that are deployed as part of the Service Mesh. If you’re running testing or deploying these in a nested lab, the resource requirements may be too high for your infrastructure. This post shows you how you can edit the OVF appliances to be deployed with lower resource requirements.

When HCX is deployed there are three appliances that are deployed as part of the Service Mesh. These are detailed below.

ApplianceRolevCPUMemory (GB)
IXInterconnect appliance83
NEL2 network extension appliance83
WOWAN optimization appliance814
Total2420

As you can see, these three appliances require a lot of resources just for one Service Mesh. A Service Mesh is created on a 1:1 basis between source and destination. If you connected your on-premises environment to another destination, you would need another service mesh.

For example, if you had the following hybrid cloud requirements:

Service MeshSource siteDestination sitevCPUsMemory (GB)
1On-premisesVCPP Provider2420
2On-PremisesVMware Cloud on AWS2420
3On-PremisesAnother On-premises2420
Total7260

As you can see, resource requirements will add up.

If you’re running testing or deploying these in a nested lab, the resource requirements may be too high for your infrastructure. This post shows you how you can edit the OVF appliances to be deployed with lower resource requirements.

Disclaimer: The following is unsupported by VMware. Reducing vCPU and memory on any of the HCX appliances will impact HCX services.

  1. Log into your HCX manager appliance with the admin account
  2. do a su – to gain root access, use the same password
  3. go into the /common/appliances directory
  4. here you’ll see folders for sp and vcc, these are the only two that you need to work in.
  5. first lets start with sp, sp stands for Silverpeak which is what is running the WAN optimization.
  6. go into the /common/appliances/sp/7.3.9.0 directory
  7. vi the file VX-0000-7.3.9.0_62228.ovf
  8. go to the section where virtual cpus and memory is configured and change to the following. (I find that reducing to four vCPUs and 7GB RAM for the WO appliance is good).
       <Item>
         <rasd:AllocationUnits>hertz * 10^6</rasd:AllocationUnits>
         <rasd:Description>Number of Virtual CPUs</rasd:Description>
         <rasd:ElementName>4 virtual CPU(s)</rasd:ElementName>
         <rasd:InstanceID>1</rasd:InstanceID>
         <rasd:Reservation>1000</rasd:Reservation>
         <rasd:ResourceType>3</rasd:ResourceType>
         <rasd:VirtualQuantity>4</rasd:VirtualQuantity>
       </Item>
       <Item>
         <rasd:AllocationUnits>byte * 2^20</rasd:AllocationUnits>
         <rasd:Description>Memory Size</rasd:Description>
         <rasd:ElementName>7168MB of memory</rasd:ElementName>
         <rasd:InstanceID>2</rasd:InstanceID>
         <rasd:Reservation>2000</rasd:Reservation>
         <rasd:ResourceType>4</rasd:ResourceType>
         <rasd:VirtualQuantity>7168</rasd:VirtualQuantity>
       </Item> 

Next configure the IX and L2E appliances, these are both contained in the vcc directory.

  1. go to the /common/appliances/vcc/3.5.0 directory
  2. vi the vcc-va-large-3.5.3-17093722.ovf file, again changing the vCPU to 4 and leaving RAM at 3 GB.
  <Item>
         <rasd:AllocationUnits>hertz * 10^6</rasd:AllocationUnits>
         <rasd:Description>Number of Virtual CPUs</rasd:Description>
         <rasd:ElementName>4 virtual CPU(s)</rasd:ElementName>
         <rasd:InstanceID>1</rasd:InstanceID>
         <rasd:ResourceType>3</rasd:ResourceType>
         <rasd:VirtualQuantity>4</rasd:VirtualQuantity>
       </Item> 

Once you save your changes and create a Service Mesh, you will notice that the new appliances will be deployed with reduced virtual hardware requirements.

Hope this helps your testing with HCX!

Using FaceTime on your Mac for Conference Calls with Webex, GoToMeeting and GlobalMeet

Using FaceTime on your Mac to make and receive conference calls.

If like me you’re generally plugged into your laptop with a headset when working in a nice comfy place and dislike using your cellphone’s speaker and mic or apple headset for calls but instead prefer to take calls on your laptop using the Calls From iPhone feature.

1

This enables you to easily transition from what you were doing on your laptop – for example, listening to Apple Music, watching YouTube or whatever and flawlessly pick up a call or make a new call directly from your laptop. The benefits here are that you don’t need to take off your headset and continue working without switching devices or changing audio inputs for those with Bluetooth connected headsets.

But have you noticed that the FaceTime interface on OSX has no keypad? This is a problem when you need to pick up a call from the call-back function from Webex for example. Webex asks you to press ‘1’ on the keypad to be connected to the conference. Likewise, if you need to dial into a conference call with Webex, GoToMeeting or Globalmeet, you’ll need to use a keypad to enter the correct input followed generally by ‘#’ to connect. This is a little difficult if there is no keypad right?

If you tried to open up the keypad on your iPhone whilst connected to a call on your Mac, then the audio will transfer from your Mac to your iPhone and you cannot transfer it back.

2.png

Luckily there is a workaround. Well two actually, one will enable you to use the call-back functions from conference call systems and the other will enable you to dial into the meeting room directly.

When you receive a call-back call from Webex for example, and are asked to enter ‘1’ to continue, press the Mute button, then use your keyboard’s keys to provide the necessary inputs – press Mute, press 1, press #, then unmute as necessary.

3.png

The second workaround involves using direct-dial by just typing/pasting the conference number and attendee access codes directly into FaceTime before making the call. A comma ‘,’ sends a pause to the call, enabling you to enter the attendee access code and any other inputs that you need.

4.png

I find that both these work very well for me, mute works for call-back functions and direct-dial works very well when I need to join a call directly. The mute workaround is also very effective when using an IVR phone system too, think banking, customer services systems.

I hope this helps!

Atlantis USX 3.5 – What’s New?

I’m excited to announce the latest enhancements to the Atlantis USX product following the release of Atlantis USX 3.5.

Before we delve too deep in what’s new in USX 3.5, let’s take a brief recap on some of the innovative features from our previous releases.

We delivered USX 2.2 back in February 2015 where we delivered XenServer Support and LDAP authentication, USX 3.0 followed in August 2015 with support for VMware VVOLs, Volume Level Snapshot and Replication and the release of Atlantis Insight. USX 3.1 gave us deduplication aware stretched cluster and also multi-site disaster recovery in October 2015. Two-node clusters were enabled in USX 3.1.2 as well as enhancements to SnapClone for workspace in January 2016.

Some of these features were first in the industry features, for example, support for VMware VVOLs on a hyperconverged platform, all-flash hyperconverged before it became an industry standard and deduplication-aware stretched cluster using the Teleport technology that we pioneered in 2014 and released with USX 2.0.

1

Figure 1. Consistent Innovation

The feature richness and consistent innovation is something that we strive to continue to deliver with USX 3.5 coupled with additional stability and operationally ready feature set.

Let’s focus on the key focus areas with this latest release and what makes it different from the previous versions. Three main areas with the USX 3.5 enhancements are Simplify, Solidify and Optimize. These areas are targeted to provide a better user experience for both administrators and end users.

Simplify

XenServer 7 – USX 3.5 adds support for running USX on XenServer 7, in addition to vSphere 6.2.

Health Checks – We’ve added the ability to perform system health checks at any time, this is of course useful when planning for either a new installation or an upgrade of USX. Of course you can also run a health check on your USX environment at any time to make sure that everything is functioning as it should. This great feature helps identify any configuration issues prior to deployment of volumes. The tool will give pass or fail results for each of the test items, however, not all failed items prevent you from continuing your deployment, these will be flagged as a warning. For example, Internet Accessibility is not a requirement for USX, it is used to upload Insight logs or check for USX updates.

2

Figure 2. Health Checks

Operational Simplicity – enhancing operational simplicity, making things easier to do. On-demand SnapClone has been added to the USX user interface (UI), this enables the ability to create a full SnapClone – essentially a full backup of the contents of an in-memory volume to disk before any maintenance is done on that volume. This helps with maintenance of your environment where you need to quickly take a hypervisor host down for maintenance, the ability to instantly do a SnapClone through the UI makes this an easier method than in previous versions.

3

Figure 3. On-demand and scheduled SnapClones

Simple Maintenance Mode – We’ve also added the ability to perform maintenance mode for Simple Volumes. Simple Volumes can be located on local storage to present the memory from that hypervisor as a high performance in-memory volume for your virtual machine workloads such as VDI desktops. You can now enable maintenance mode using the Atlantis USX Manager UI or the REST API on simple volumes. What this does is that it will migrate the volume from one host to another, enabling you to put the source host into maintenance mode to perform any maintenance operations. This works with both VMware and Citrix hypervisors.

4

Figure 4. Simple Maintenance Mode

Solidify

Alerting is an area that has also been improved. We have added new alerts to highlight utilization of the backing disk that a volume uses. Additionally, alerts to highlight snapshot utilization is also now available. Alerts can be easily accessed using the Alerts menu in the GUI and are designed to be non-invasive however due to their nature, highly visible within the Alerts menu in the USX web UI for quick access.

Disaster Recovery for Simple Hybrid Volumes

Although this is now a new feature in USX 3.5, we’ve actually been deploying this in some of our larger customers for a few years now and the automation and workflows are now being exposed into the USX 3.5 UI. This feature enables simple hybrid volumes to be replicated by underlying storage with replication enabled technology, coupled with the automation and workflows, simple hybrid volumes can be recovered at the DR site with volume objects like the export IP addresses and volume identities being changed to suit the environment at the DR site.

Optimize

Plugin Framework is now a key feature to the USX capabilities. It is an additional framework which is integrated into the USX Web UI. It allows for the importing and running of Atlantis and community created plugins written in Python that enhance the functionality of USX. Plugins such as guest VM operations or guest VM query capabilities. These plugins enable guest-side operations such as restart of all VMs within a USX volume, or query the DNS-name of all guest VMs residing in a USX volume.

5

Figure 5. USX Plugin Framework

I hope you’ll agree that the plugin framework will provide an additional level of capabilities on top of the great capabilities we already have for automation and management such as the USX REST API and USX PowerShell Cmdlets.

Reduced Resource Requirements for volume container memory – we’ve decreased the metadata memory requirements by 40%. In previous versions the amount of memory assigned to metadata was a percentage of the volume export size before data reduction, for example, if you exported a volume of 1TB in size, the amount of memory reserved for metadata would then be 50GB, with USX 3.5 this is now reduced down to just 30GB, whilst still providing the same great performance and data reduction capabilities with fewer memory resources requirements. USX 3.5 optimizations also include the reduction of local flash storage required for the performance tier when using hybrid volumes, we’ve decreased the flash storage requirements by 95%!

In addition to reducing the metadata resource and local flash requirements, we’ve also reduced the amount of storage required for SnapClone space by 50%. This reduction reduces the SnapClone storage footprint on the underlying local or shared storage enabling you to use less storage for running USX.

6

ROBO to support vSphere Essentials.

ROBO use case is now even more cost effective with USX 3.5. This enhancement enables the use of the VMware vSphere Essentials licensing model for customers who prefer the VMware hypervisor over Citrix XenServer. This is a great option for remote and branch offices with three or less servers that wish to enable high performance, data reduction aware storage for remote sites.

Availability

Atlantis USX 3.5 is available now from the Atlantis Portal. Download now and let me know what you think of the new capabilities.

7

Release notes and online documentation are available here.

Virtual Volumes – Explained with Carousels, Horses and Unicorns – in pictures

VMwire

[Tongue in cheek. There’s no World Cup on today so I made this. Please don’t take this too seriously.]

A SAN is like a carousel

  • It provides capacity (just like a carousel) and performance (when the carousel goes around).
  • People ride on static horses bolted to the carousel and try to enjoy the ride.
  • This horse is like a LUN. The horse does not know who is riding it.
  • Everybody travels at the same speed unless you happen to sit on the outside where things go a little bit faster.
  • The speed is relative to how fast the carousel rotates and how quickly you can get to an outside seat (if you want that extra speed and wind through your hair).
  • If you want to guarantee an outside seat, you can get to the front of the queue by having a FastPass+.
  • Get a bigger motor, or increase the speed, the carousel…

View original post 168 more words

Atlantis USX Data Services with Hyper-Converged Architecture – Web Scale, Virtual Volumes & In-line Deduplication

VMwire

Atlantis USX has some very cool technology which I’ve had the pleasure to ‘play’ with over the past few weeks. In these series of posts I’ll attempt to cover the various technologies within the Atlantis USX stack.

The key technologies in the Atlantis USX In-Memory Data Services are:

  1. Inline IO and Data de-duplication
  2. Content aware IO processing
  3. Compression
  4. Fast Clone
  5. Storage Policies
  6. Thin Provisioning

This post focuses on Inline IO and Data de-duplication (or just dedupe for short) and Fast Clone and how these rich data services enable a hyper converged solution to outperform enterprise storage arrays.

Why would you use Atlantis USX?

The best way to approach this is to look at some use cases: Crazy as it seems, Atlantis USX delivers All-Flash Array performance but also gives five times the capacity of traditional storage arrays. Doing this with 100% software, no hardware appliances, and true software defined storage…

View original post 2,457 more words

Cannot decrypt password in sysprep after upgrading vCenter Server Appliance

A really quick post.

I’ve recently just upgraded from vCSA 5.1 to vCSA 5.5 link and found that Horizon View can no longer complete sysprep customization due to the public key being changed when you upgrade to a new appliance.

cannot decrypt password

Just edit the customization specification to fix. Hope this helps.

#VMwarePEX parties

Quick post to list all the parties and tweetups that are happening this week.


Day Time Venue Details
Saturday 1830 – late vBeers @ Ri Ra Irish Pub, Mandalay Bay ResortThe Shoppes at Mandalay Bay Place, 3930 Las Vegas Blvd South, Las Vegas, NV http://www.vbeers.org/2013/02/20/vbeers-las-vegas-nv-saturday-23-february-2013/


BYOWallet.

Sunday 2100 – late Community Tweetup @ The Burger Bar
Mandalay Place is located in the mall between Mandalay Bay & Luxor.
3930 Las Vegas Boulevard S. #121A
Las Vegas Nevada. 89119
http://tweetvite.com/event/GeeksWithoutBorders
Not sponsored by organised by @CommsNinja, @hansdeleenheer and @mjbrender


BYOWallet

Monday 1700 – 1900 Welcome Reception @ Solutions Exchange Kick off VMware Partner Exchange 2013 at the Welcome Reception. The Weclome Reception is a great opportunity to explore the Solutions Exchange, check out cool products and solutions, and interact with peers, partners and VMware teams. Sponsored by EMC.
Signup for #VMwareTweetup, taking place 5:30-7:30 in the Hang Space of the Solutions Exchange (same time as the Welcome Reception) to network with peers and to learn about VMware Link, the new social collaboration platform for VMware Partners! Later, you can also join the #PEXTweetup, an “unofficial” offsite sponsored tweetup for the community.
1900 – late Unofficial Tweetup @ Nine Fine Irishmen at New York, New York, 3790 S Las Vegas Blvd – Las Vegas, NV Unofficial Official Community Tweetup sponsored by HP Storage and Veeam.http://twtvite.com/CommunityAtPEX
Tuesday 1630 – 1830 Hall Crawl @ Solutions Exchange Grab a drink and discover new technologies while connecting with new partners and other attendees in the Solutions Exchange!
1730 – 1930 vExpert and VCDX Reception @ Ri Ra Irish Pub, Mandalay Bay Resort vExperts and VCDXes by invitation only.
1900 – 2200 VMware Partner Awards reception & dinner.
Breakers, South Convention Center Level 2.
Invitation only.
Wednesday 1930 – 1030 Partner Appreciation Party Join your colleagues at the Partner Appreciation Lounge in the Mandalay Ballroom! The evening will kick off with the club sounds of DJ Mike Attack and a lounge-style buffet, beer and wine. Then later, Third Eye Blind will take the stage with hits like “Jumper”, “Semi-Charmed Life”, and “Graduate”!

2012 in review

2012 summary of VMwire, not too bad although I did not blog much this year. Will try to do more in 2013. Thanks for visiting.

The WordPress.com stats helper monkeys prepared a 2012 annual report for this blog.

Here’s an excerpt:

About 55,000 tourists visit Liechtenstein every year. This blog was viewed about 250,000 times in 2012. If it were Liechtenstein, it would take about 5 years for that many people to see it. Your blog had more visits than a small country in Europe!

Click here to see the complete report.

Power CLI Quick Start Guide

1. INTRODUCTION

1.1 Overview

The VI Toolkit (for Windows) provides a powerful yet simple command line interface for task based management of the VMware Infrastructure platform. Windows Administrators can easily manage and deploy the VMware Infrastructure with a familiar, simple to use command line interface.

The VI Toolkit (for Windows) is a tool that system administrators and developers can use to automate the management of VMware Virtual Infrastructure. With the VI Toolkit (for Windows), many tedious and time-consuming tasks can be completely automated in as little as one line of code.

The VI Toolkit (for Windows) takes advantage of Windows PowerShell and .NET to bring unprecedented ease of management and automation to the Virtual Infrastructure platform. The VI Toolkit (for Windows) provides 125 PowerShell cmdlets that cover all aspects of Virtual Infrastructure management.
Some common tasks that the VI Toolkit (for Windows) can be used to perform include:

  • Snapshoting all virtual machines.
  • Disconnecting or removing all Floppy or CD-ROM drives from all Virtual Machines.
  • Large-scale cloning of templates.
  • Moving large numbers of Virtual Machines from one virtual switch to another.
  • Migrating large numbers of Virtual Machines between ESX hosts.
  • Reports and monitoring across the entire Virtual Infrastructure.

1.2 System Requirements

The following platforms are supported by the VI Toolkit (for Windows):

  • Microsoft Windows Server 2003 R2 (32 or 64 bit)
  • Microsoft Windows Server 2003 with Service Pack 2 (SP2) (32 or 64 bit)
  • Microsoft Windows Server 2003 with Service Pack 1 (SP1) (32 or 64 bit)
  • Microsoft Windows XP with Service Pack 2 (SP2) (32 or 64 bit)
  • Microsoft Windows Vista (32 or 64 bit)

1.3 Virtual Infrastructure Platforms Supported

The following platform combinations are supported by the VI Toolkit (for Windows):

  • Management of ESX 3.0.2 using Virtual Center 2.5
  • Management of ESX 3.5 using Virtual Center 2.5
  • Management of ESXi 3.5 using Virtual Center 2.5
  • Direct management of ESX 3.0.2
  • Direct management of ESX 3.5
  • Direct management of ESXi 3.5

1.4 Pre-requisites

The following tables lists the software pre-requisites and the location to each installer. This guide focuses on the most recent releases as dated 05/02/2009, which are Windows PowerShell V2 CTP3, VI Toolkit (for Windows) version 1.5 and the VI Toolkit Community Extensions build 46896.

Windows PowerShell
VI Toolkit (for Windows)
VI Toolkit Community Extensions

Another pre-requisite that is also recommended for general administration is Notepad++. This is used to create and edit scripts that can be run with the VI Toolkit.
Notepad++ can be downloaded from here.

2. INSTALLATION

There are three installation tasks that need to be performed before you can start using the VI-Toolkit to manage a VMware Infrastructure.

Windows PowerShell. The VI Toolkit 1.5 (for Windows) requires Microsoft PowerShell V2 CTP 3.

Please download it from here.

VI Toolkit (for Windows). Can be downloaded from here.

VI Toolkit Community Extensions. Can be downloaded from here.

3. SETTING UP THE VI TOOLKIT

The procedures below go through in detail how to get the VI-Toolkit up and running after installation. Once installed the icon below will be available on the Windows Desktop.

DO NOT LAUNCH IT YET!

Before launching the VMware VI Toolkit application, you must first set up your PowerShell profile. The new desktop shortcut does two things for you: it starts powershell with the VI Toolkit snapin loaded and it runs a script which modifies the look of the Powershell window and adds some cool extra functions. If you want to have the same functionality in your normal Powershell window and your scripts, you have to copy some stuff to your Powershell profile.

3.1 First, set up your profile:

1. Start a normal PowerShell Window by navigating to Start | All Programs | Windows PowerShell V2 (CTP3) | Windows PowerShell V2 (CTP3), the following will be launched:

2. Run the following command:
Test-Path $profile

3. If it returned True then you already have a profile file. If it returned False, then proceed to the next step.

4. Create a profile file by running:
New-Item $profile –ItemType File

5. If an error is returned then create a WindowsPowerShell directory under your My Documents folder and then repeat step 4.

3.2 Adding the snap-in:

1. Open your profile by running:
Invoke-Item $profile

2. Add the following line to the profile file to load the snap-in:
Add-PSSnapIn VMware.VimAutomation.Core -ErrorAction SilentlyContinue

3.3 Adding undocumented functions

1. Open the file C:\Program Files\VMware\Infrastructure\VIToolkitForWindows\Scripts\Initialize-VIToolkitEnvironment.ps1

2. Copy the following Function Blocks to your profile file:
Get-VICommand, New-DatastoreDrive, New-VIInventoryDrive, Get-VIToolkitDocumentation, Get-VIToolkitCommunity

If the steps were performed successfully, then your profile will be present in the folder structure C:\Documents and Settings\Hugo Phan\My Documents\WindowsPowerShell/ Microsoft.PowerShell_profile.ps1

And its contents will look something like this:

3.4 Enabling the execution of scripts

The Set-ExecutionPolicy changes the user preference for the execution policy of the shell. The execution policy is part of the security strategy of Windows PowerShell. It determines whether you can load configuration files (including your Windows PowerShell profile) and run scripts, and it determines which scripts, if any, must be digitally signed before they will run.

You need to set the execution policy to unrestricted using the below cmdlet

set-executionpolicy unrestricted


get-executionpolicy
will return the current execution policy.

The default ExecutionPolicy is Restricted. Unrestricted is unnecessarily risky.

Set-ExecutionPolicy RemoteSignedis more secure and works for VI Toolkit 1.5.

3.5 Loading the Community Extensions

The VI Toolkit for Windows Community Extensions is a PowerShell module designed to work with the VI Toolkit for Windows.

1. Download and extract the package and then copy the coreModule folder to the root of C:

2. Open up a Windows PowerShell session and then type in the following command
Import-Module “c:\coreModule\viToolkitExtensions.psm1”

Now you are ready to start using the VI Toolit by either logging into a vCenter environment or by launching scripts.

Upgrading to VMware vSphere using the vSphere Host Update Utility

There are three ways in which to upgrade to VMware vSphere, these are

  1. VMware Update Manager
  2. vSphere Host Update Utility 4.0, and
  3. a clean install of vSphere

This post goes through the upgrade process using the vSphere Host Update Utility 4.0. A 10 minute video is available here:

The vSphere Host Update Utility 4.0 is an application that is installed as part of the vSphere vCenter installation package.

  1. To start the upgrade process, launch the vSphere Host Update Utility.
  2. The vSphere Host Update Utility will request confirmation to connect to the VMware patch repository.
  3. Add the host to the update utility by clicking on Host | Add Host.
  4. Type in the FQDN or IP address of the host you wish to upgrade then click on Add.
  5. Now click on the Upgrade button to start the upgrade wizard.
  6. Next browse to the location of your vSphere ISO file then click on Next.
  7. Read and accept the license agreement to continue.
  8. Enter the root credentials then press Next.
  9. The Host compatibility check will perform some checks and will allow the upgrade to continue if the host meets the criteria.
  10. Next select a local datastore (recommended) to store the disk file for the Console OS and also select the disk size.
  11. Leave all other settings on default and finish the Wizard
  12. Once complete, reconnect the host in vCenter to install the new vCenter Agent.

Disaster Recovery just got "sESXi"


Notes on using vRanger Pro & ESXi for Disaster Recovery

Just succesffully proved vRanger Pro to restore backups taken from Production (ESX 3.5, vRanger Pro on physical with VCB) to infrastructure in DR (ESXi 3.5, vRanger Pro on a VM, non VCB). All this from provisioning DR Infrastructure (ESXi Servers, Storage, vCenter VM) within 1 hour. Silver tier recovery just got “sESXi”!

Infrastructure at Production

  • ESX 3.5 Update 2 on BL460C
  • Storage on 400Gb LUNs presented by IBM SVC
  • VC 2.5 Update 2 VM
  • vRanger 3.8.2.1 & VCB 1.5 & vRanger Pro VCB Plugin 3.0 on Physical DL380 G5 Server
  • VM backups on TSM and replicated to DR

Infrastructure at DR

  • ESXi Update 3 USB on DL360 G5
  • Local Storage
  • VC 2.5 Update 4 VM
  • vRanger 3.2.9.7 & VCB 1.5 & vRanger Pro VCB Plugin 3.0 on W2K3 SP2 VM + .Net Framework 2.0 SP1

Important points to note

If you are running vRanger in a virtual machine to restore workloads backed up by vRanger installed on a physical host, with either traditional LAN based backup or VCB based backup. It is important that the software is installed in the correct order and all the necessary software is installed to enable vRanger to restore both types of backup. If the physical vRanger server performed a backup of a workload using the VCB framework, then you will not be able to restore that workload using another vRanger server unless the VCB framework is also installed. For example, you wish to perform a restore at a DR site.

The correct installation order is

  • Microsoft .Net Framework 2.0 SP1
  • vRanger Pro
  • vRanger Pro VCB Integration module
  • vRanger Pro file-level plugin
  • VMware VCB Framework

Tips

  • Install software in the correct order
  • Create the same directory structure for the VM at the DR site as it is at Production. E.g, if the vRanger working directory is D:\vRanger_Backups at Production, then keep the same directory structure for the vRanger server at DR.
  • This will enable you to first restore the vRanger database (esxRanger.mdb), which then populates the Restore table saving valuable time and effort because you will no longer need to use “Restore from Info”
  • If restoring a vRanger backup that was taken using the VCB framework, then the vRanger server at DR will also need to have the VCB framework installed.

What to do when an ESX host shows not responding?

Steps in order to progress

1) Login in the affected ESX server using Putty

2) service mgmt-vmware restart

If this doesn’t work then the vmware-hostd daemon has to be killed.

3) ps -e | grep vmware-hostd
Look for the process_id associated with vmware-hostd

4) kill process_id
i.e. if 3) returned:
32470 ? 00:01:12 vmware-hostd
the command would be:
kill 32470

5) service mgmt-vmware status
if the service is started use
service mgmt-vmware restart
if it’s stopped use:
service mgmt-vmware start

Using ESX 3.5 vmware-vim-cmd instead of vimsh

vmware-vim-cmd

For those of you familiar with vimsh and used it to configure a scripted install of ESX 3.5, have you noticed that the following error would occur when launching commands using /usr/bin/vimsh ?

/usr/bin/vimsh -n -e “hostsvc/maintenance_mode_enter

Alternatively, by using the wrapper developed for ESX 3.5, vmware-vim-cmd, you would get the following:

/usr/bin/vmware-vim-cmd hostsvc/maintenance_mode_enter

The two commands are detailed in the Xtravirt whitepapers, vimsh and vimsh for ESX 3.5. I would recommend at least having a quick browse to see what can be achieved with these commands. Using vmware-vim-cmd in conjunction with esxcfg- can achieve some very interesting results, especially if you love to create the perfect KickStart build script.

If only it is possible to launch vmware-vim-cmd commands using the RCLI just as esxcfg- can be launched using vicfg-. Anyone have an idea?

A few more examples

Refreshing the network settings
/usr/bin/vmware-vim-cmd hostsvc/net/refresh

Refreshing the storage
/usr/bin/vmware-vim-cmd hostsvc/storage/refresh

The all important enabling VMotion
/usr/bin/vmware-vim-cmd hostsvc/vmotion/vnic_set vmk0

And how about setting vSwitch1 to use Route Based on IP Hash?
/usr/bin/vmware-vim-cmd hostsvc/net/vswitch_setpolicy –nicteaming-policy=loadbalance_ip vSwitch1

And setting vSwitch0 to use Route Based on the Originating Virtual PortID. (vSwitch0 has two portgroups using VLAN tagging, 1 for Service Console and 1 for VMotion, we wish to use active-passive nic teaming policy)

Set active vmnic0 and standby vmnic2 for Service Console
/usr/bin/vmware-vim-cmd hostsvc/net/portgroup_set –nicorderpolicy-active=vmnic0 vSwitch0 ‘Service Console’
/usr/bin/vmware-vim-cmd hostsvc/net/portgroup_set –nicorderpolicy-standby=vmnic2 vSwitch0 ‘Service Console’

Set active vmnic2 and standby vmnic0 for VMkernel network
/usr/bin/vmware-vim-cmd hostsvc/net/portgroup_set –nicorderpolicy-active=vmnic2 vSwitch0 VMkernel
/usr/bin/vmware-vim-cmd hostsvc/net/portgroup_set –nicorderpolicy-standby=vmnic0 vSwitch0 VMkernel

Set vSwitch overide load balancing policy
/usr/bin/vmware-vim-cmd hostsvc/net/portgroup_set –nicteaming-policy=loadbalance_srcid vSwitch0 ‘Service Console’
/usr/bin/vmware-vim-cmd hostsvc/net/portgroup_set –nicteaming-policy=loadbalance_srcid vSwitch0 VMkernel

Let’s not forget to refresh our network settings
/usr/bin/vmware-vim-cmd hostsvc/net/refresh
/usr/bin/vmware-vim-cmd internalsvc/refresh_network