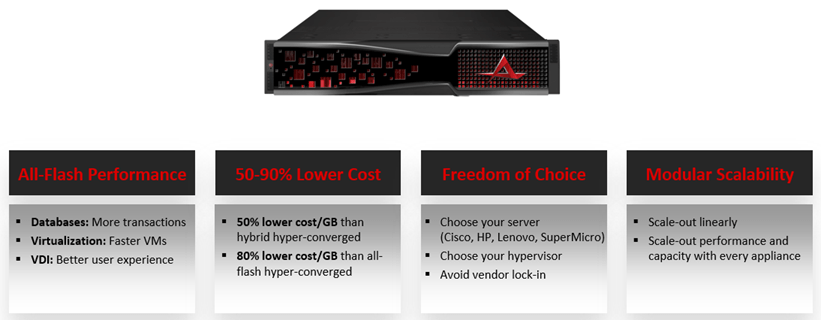
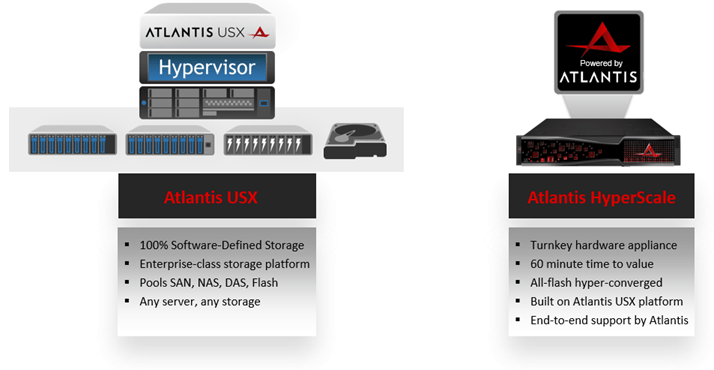
What is it?
A hyper-converged appliance running pre-installed USX software on either XenServer or VMware vSphere and on the hardware of your choice – Lenovo, HP, SuperMicro and Cisco.
How is it installed?
HyperScale comes pre-installed by Atlantis Channel Partners. HyperScale runs exactly the same software as USX, however HyperScale is installed automatically from USB key by the Channel Partner. When it is delivered to your datacenter, it is a simple 5 step process to get the HyperScale appliance ready to use.
Watch the video.
Step 1
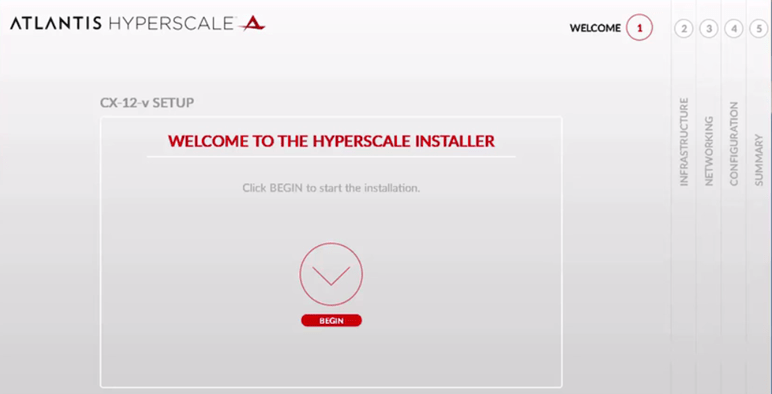
Step 2

Step 3
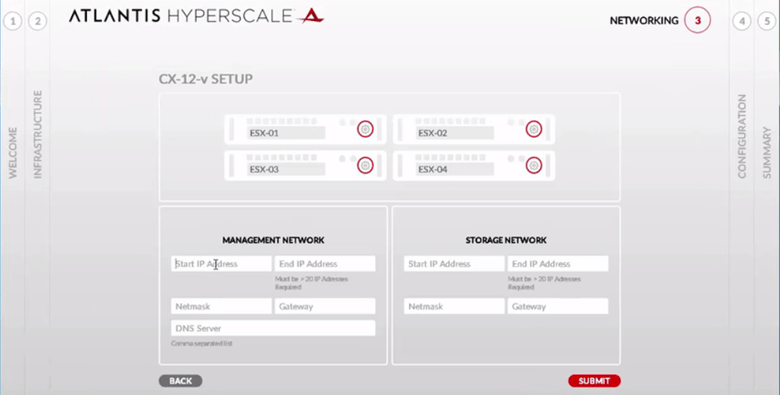
Step 4
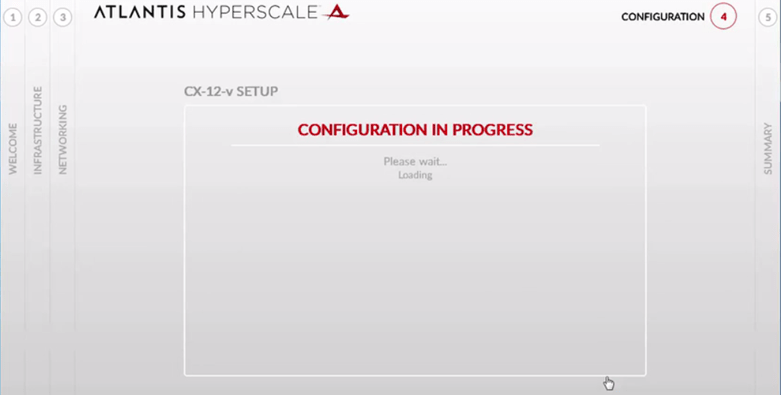
Step 5
Done.
What do you get?
The appliance is ready to use in about 30 minutes with three data stores ready for use. You can of course create more volumes and also attach and optimize external storage such as NAS/SAN in addition to the local flash devices that come with the appliance.
| Atlantis HyperScale Server Specifications | |||
 |
|||
| Server Specifications Per Node | CX-12 | CX-24 | CX-48 (Phase 2) |
| Server Compute | Dual Intel E5-2680 v3 | ||
| Hypervisor | VMware vSphere 5.5 or Citrix XenServer 6.5 | ||
| Memory | 256-512 GB | 384-512 GB | TBD |
| Networking | 2x 10GbE & 2x 1GbE | ||
| Storage | |||
| Local Flash Storage | 3x 400GB Intel 3710 SSD | 3x 800GB Intel 3710 SSD | TBD |
| Total All-Flash Effective Capacity (4 Nodes)* | 12 TB | 24 TB | 48 TB |
| Summary | |||
| Failure Tolerance | 1 node failure (FTT=1) | ||
| Number of Deployed Volumes | 3 | ||
| IOPs per Volume | More than 50,000 IOPs | ||
| Latency per Volume | Less than 1ms | ||
| Throughput per Volume | More than 210 MB/s | ||
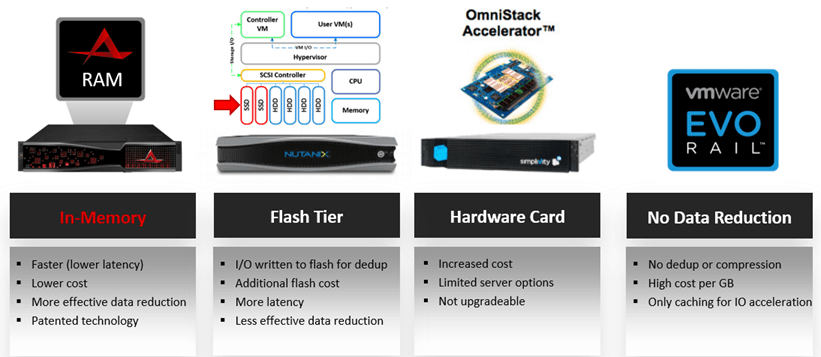
Key Differentiators vs other Hyper-converged Offerings
Apart from lower cost (another post to follow) or you can read this post from Chris Mellor from The Register, HyperScale runs on exactly the same codebase as USX. USX has advanced data services that provide very efficient data reduction and IO acceleration patented technology. For a brief overview of the Data Services please see this video.
Pricing
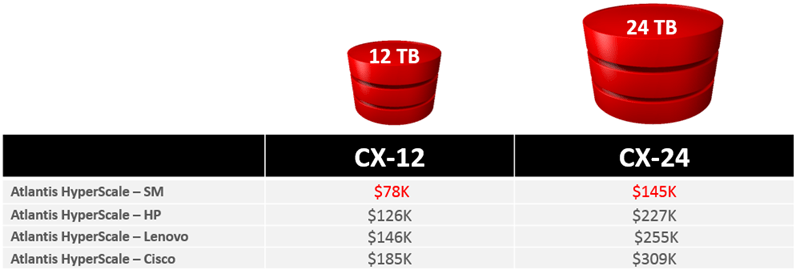
Sizing
Number of nodes = 4
SSDs per node = 3
SSD capacity = 400GB
Usable capacity per node = 1200GB
Usable capacity per appliance with FTT=1 = 3,600GB
Effective capacity with 70% de-duplication = 12,000GB
Summary