
This post covers how to install CSE 3.0.4 and enable it to work with VCD 10.2.2 and TKG 1.3. It is a simplified step by step guide on how to install CSE and get up and running with VCD as quickly as possible.
A Short Introduction to Container Service Extension
Container Service Extension (CSE) is a VMware vCloud Director (VCD) extension that helps tenants create and work with Kubernetes clusters.
CSE brings Kubernetes as a Service to VCD, by creating customized VM templates (Kubernetes templates) and enabling tenant users to deploy fully functional Kubernetes clusters as self-contained vApps.
CSE has a server component that installs as a VCD extension. It exposes REST API endpoint points via VCD. CSE also has a client component that plugs in vcd-cli, communicates with the CSE server via the exposed API endpoints, and facilitates VCD users to create Kubernetes clusters in VCD. The following diagram illustrates the interactions between the components.
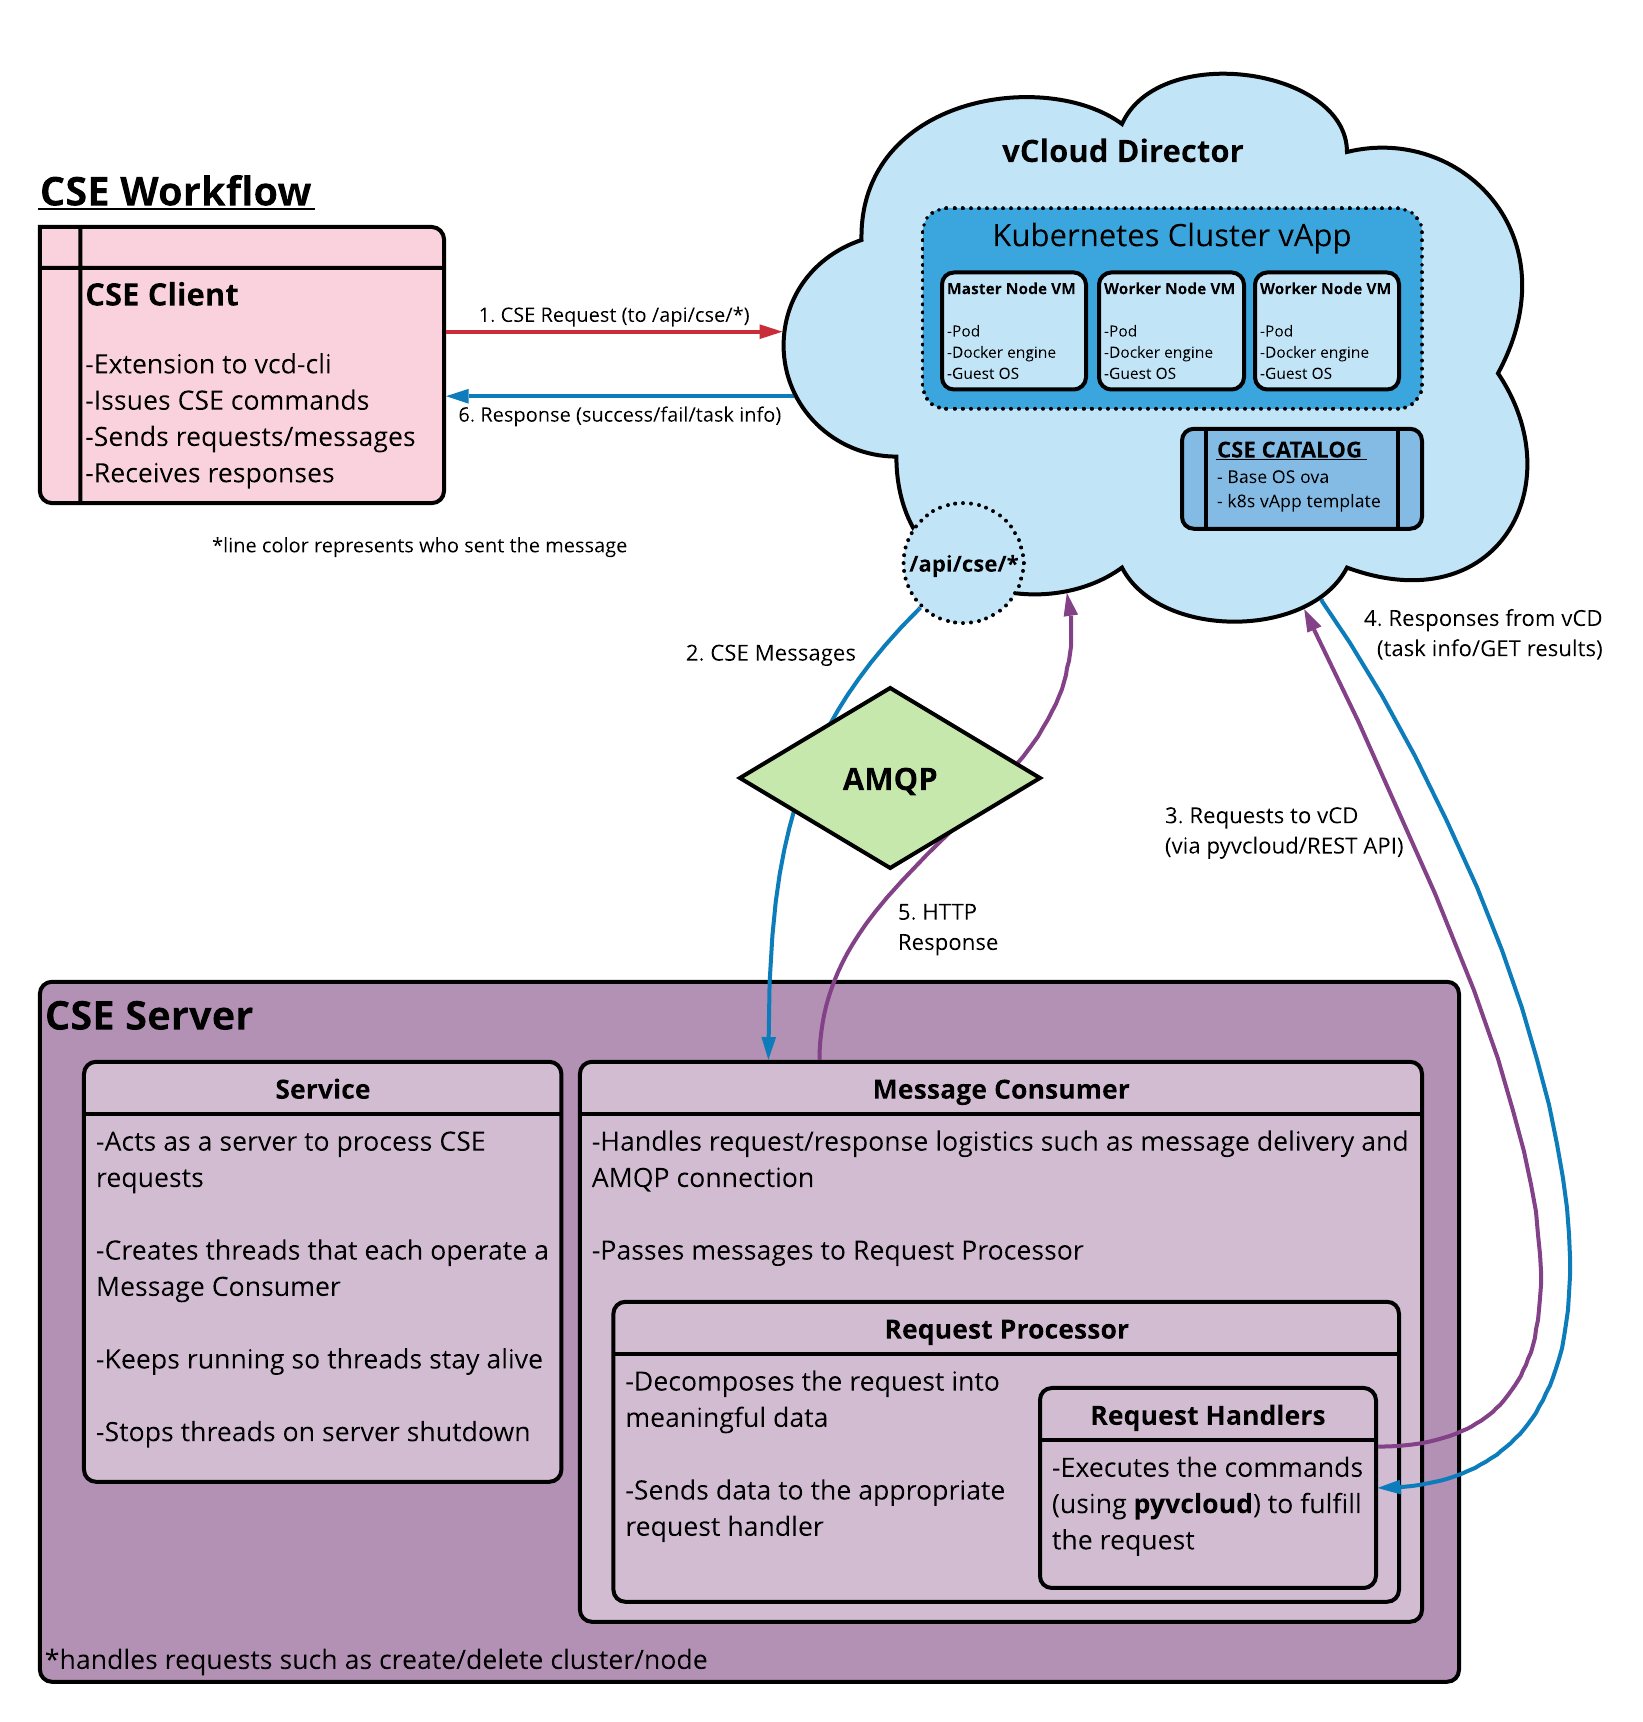
Please refer to the official documentation for more details.
However complicated the above diagram is, I aim to make the installation process super-simple. You can use this article to get up and running more quickly than using the official documentation above.
Preparing CSE Server
Choose a Linux distribution to use for the CSE server and deploy it into your vSphere management cluster and ensure that it can route to the public interface of your VMware Cloud Director instance.
We will be using MQTT which is embedded into VCD and therefore does not need RabbitMQ.
I used a Centos 8 VM with the following settings.
[Update] I’ve recently published a new post to show how you can deploy CSE server on Photon OS and run it as a Linux service. I recommend using Photon OS instead of CentOS.
| Component | Specification |
| Centos 8 image | CentOS-8.4.2105-x86_64-boot.iso |
| vCPUs | 1 |
| Memory | 2GB |
| Network | Management Network (same as vCenter, NSX-T Manager etc) |
| Routes | Routable to vCD public URL and has outbound Internet access. |
| Other configuration | DNS, NTP, VMware Tools |
Perform the following on the Centos 8 VM
yum update
yum upgrade

yum install -y yum-utils
yum groupinstall -y development
yum -y install python38 python38-pip python38-devel
easy_install-3.8 pip
pip3 install --user vcd-cli

# Add /root/.local/bin to PATH to remove path errors for vcd-cli
PATH=$PATH:/root/.local/bin
export PATH

# Check vcd cli is installed correctly
vcd version

# Check python version
python3 --version

# Uninstall cryptography and humanfriendly
pip uninstall cryptography
pip uninstall humanfriendly

# Install CSE
pip3 install git+https://github.com/vmware/container-service-extension.git@3.0.4

# Check versions
cse version
vcd cse version

# To enable the CSE client in vcd-cli, make the ~/.vcd-cli directory
mkdir ~/.vcd-cli

# create a new file in ~/.vcd-cli/profiles.yaml
vi ~/.vcd-cli/profiles.yaml

# to include the following contents in that file
extensions:
- container_service_extension.client.cse
CSE Server Configuration
Generate a sample config.yaml file
cse sample -o config.yamlContents of my file
# Only one of the amqp or mqtt sections should be present. I am using MQTT, which is built into VCD 10.2 and is supported by CSE 3.

#amqp:
#  exchange: cse-ext
#  host: amqp.vmware.com
#  password: guest
#  port: 5672
#  prefix: vcd
#  routing_key: cse
#  username: guest
#  vhost: /

# using verify_ssl: false as this is a demo lab
mqtt:
  verify_ssl: false


vcd:
  api_version: '35.0'
  host: vcd.vmwire.com
  log: true
  password: Vmware1!
  port: 443
  username: administrator
  verify: false

vcs:
# vcenter name needs to be in FQDN format in vCD too, see screenshots below.
- name: vcenter.vmwire.com
  password: Vmware1!
  username: administrator@vsphere.local
  verify: false

service:
  enable_tkg_m: true
  enforce_authorization: false
  log_wire: false
  processors: 15
  telemetry:
    enable: true

# ensure that you have setup a dedicated organization, VDC, internet accessible network and catalog for CSE.

broker:
  catalog: cse-catalog
  default_template_name: ubuntu-20.04_tkgm-1.20_antrea-0.11
  default_template_revision: 1
  ip_allocation_mode: pool
  network: default-organization-network
  org: cse
  remote_template_cookbook_url: https://raw.githubusercontent.com/vmware/container-service-extension-templates/tkgm/template.yaml
  storage_profile: 'truenas-iscsi-luns'
  vdc: cse-vdc
A couple of notes on this config.yaml file.
- Disable certificate verification if you do not have signed SSL certificates or this is for lab purposes and you are comfortable with this.
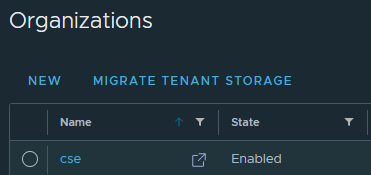
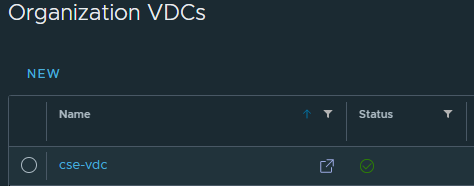
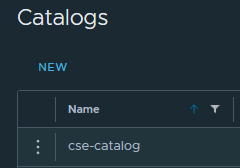
- Create a new organization, org VDC (any allocation model), catalog, organization network (with access to the internet). See my screenshots below.
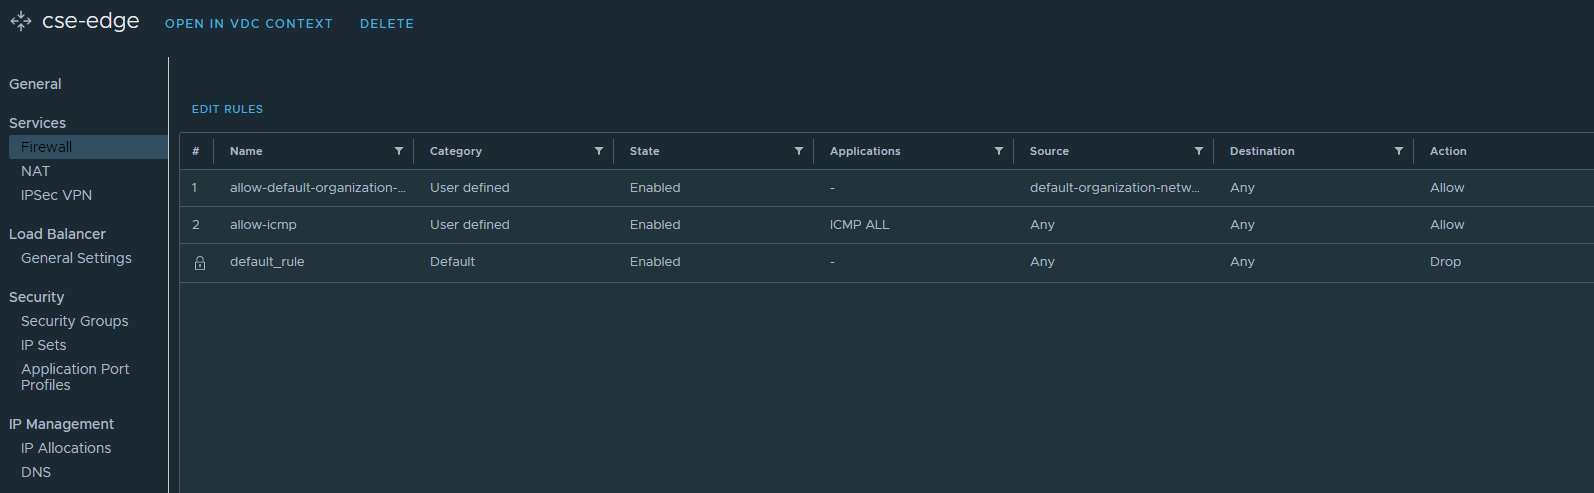
If you prefer to use an org routed network behind a NSX-T T0 then don’t forget to setup the Edge firewall and source NAT rules, I’ve provided screenshots below. Otherwise you can use a direct connect organization network backed by a port group instead. Just ensure that this network has outbound internet access.


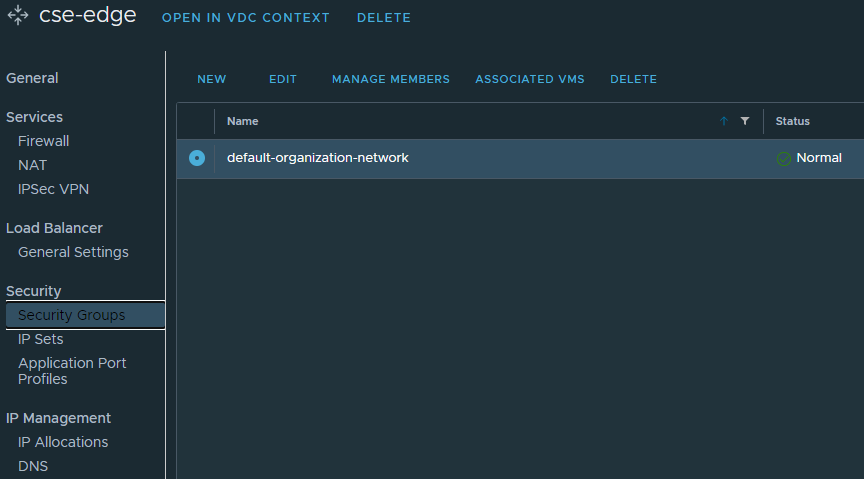
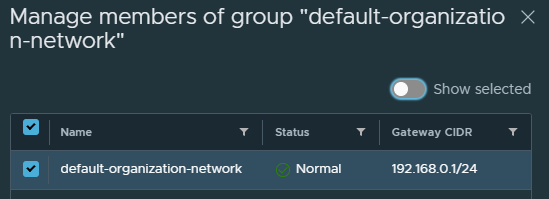

Create a static IP pool for this organization network so that the VMs that CSE prepares can be configured with networking details.
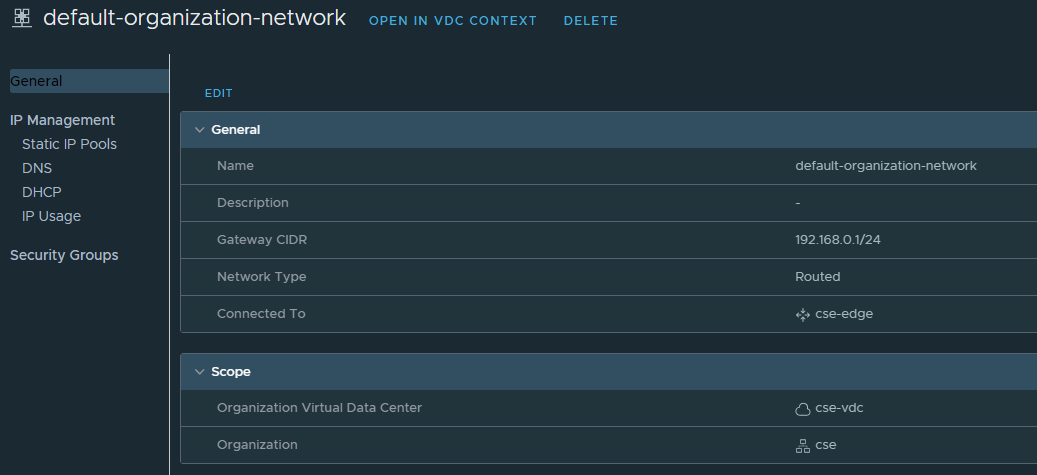

- Ensure that this new org corresponds to the settings under the broker section in the config.yaml file.
- the default_template_name can correspond to any of the templates listed in this file, look for the name parameter. This file is the TKGm specific file, if you also want to support native upstream k8s then you can use this file instead. In fact you can support both at the same time. To support both, first install CSE with one config file (TKGm) and then upgrade CSE with the other config file (native). Or use my script here that does everything for you.
- Read this documentation for pointers or place a comment below and I’ll help you out.
- Under the vcs section, you’ll notice that you need to specify a vCenter name, this has to be the same name but in a FQDN format as the vCenter Server Instance setting under Infrastructure Resources in VCD. Like my settings below:

Once everything is ready you will need to encrypt the config file as CSE will only work with an encrypted file.
cse encrypt config.yaml --output encrypted-config.yamlCSE will ask you for an encryption password, please keep a note of it.
Install CSE
Remove group and unnecessary permissions from the config file, CSE will complain if you don’t.
chmod 600 encrypted-config.yamlFirst check the validity of the config file before installing CSE.
cse check encrypted-config.yamlInstall CSE with this command
cse install -c encrypted-config.yamlThis activity will take a long time, over an hour as CSE will do the following:
- Download all of the OVAs from the template specification file. There are five templates to download
- For each OVA, it will upload to the VCD cse organization catalog, in my case cse-catalog under the cse organization
- Create a vApp for each catalog
- Prepare the VM by download bits
- Upload the VM to the catalog as a template
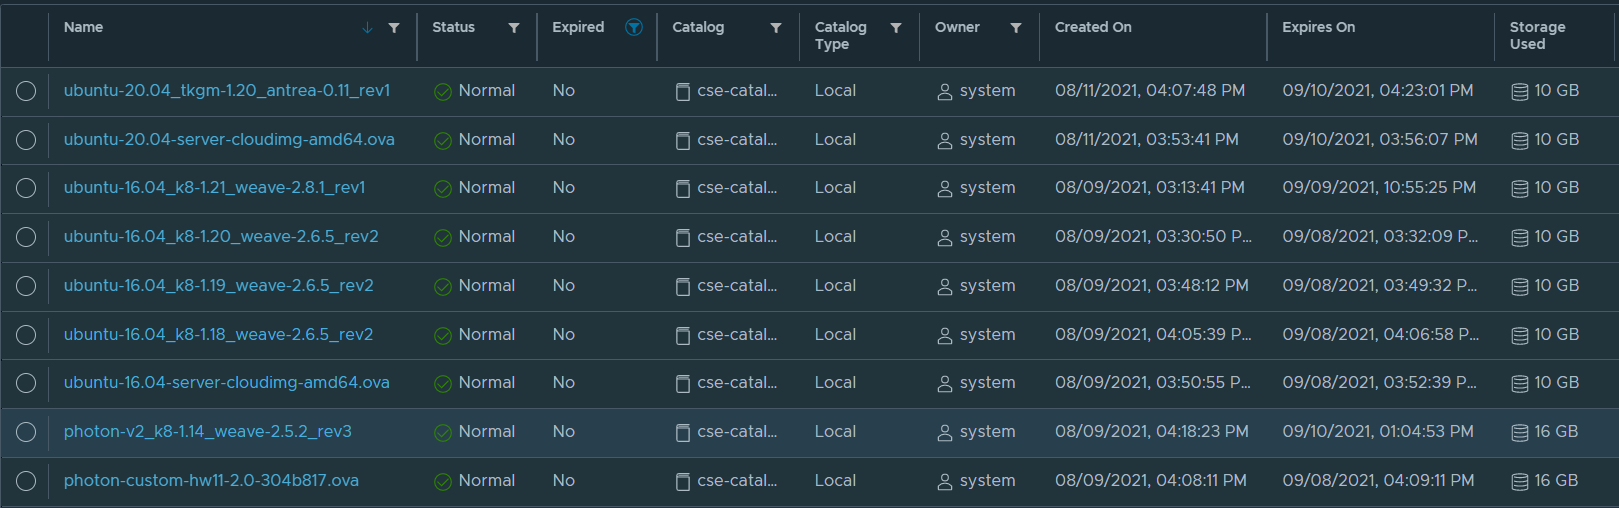
Once complete you’ll be able to see the following templates in the catalog. Note that I’ve enabled CSE to use both TKGm and native upstream k8s, hence the many templates listed here.
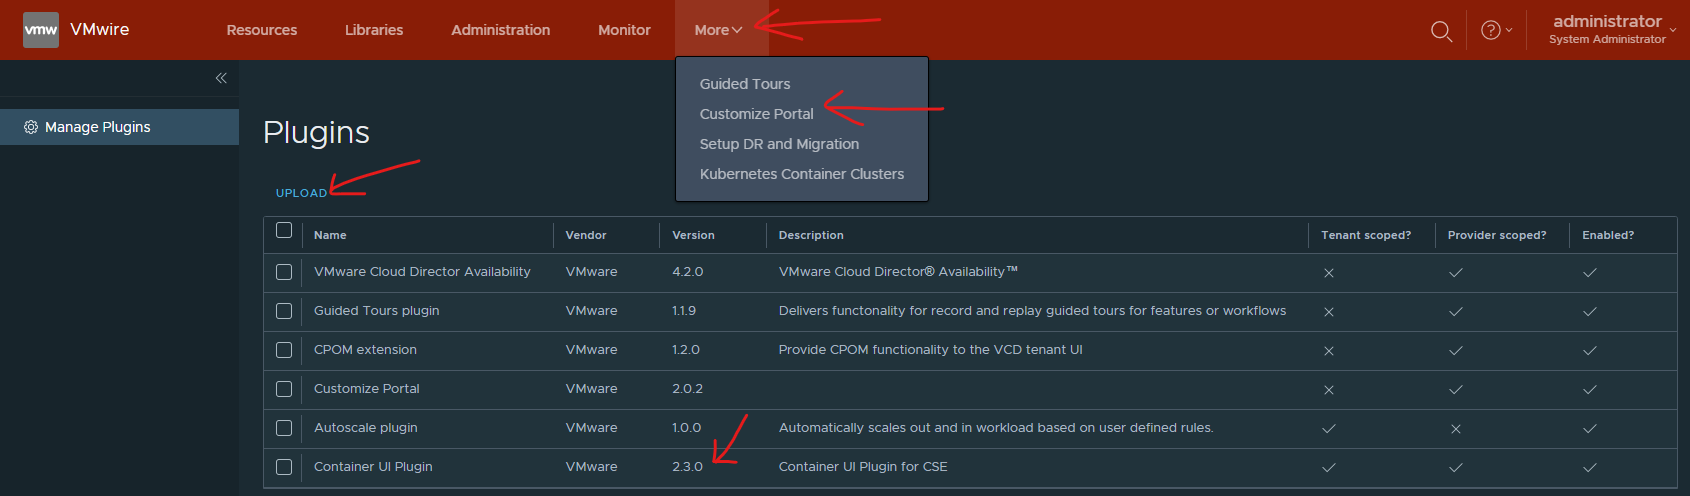
Enable CSE 2.3 Plugin in VCD
CSE 3.0.4 does not support the default CSE 2.2 plugin that is enabled by default with VCD 10.2.2. We need to disable and remove the CSE 2.2 plugin and upload and enable the CSE 2.3 plugin instead.
This plugin is available from this link on my.vmware.com.
To install it go to the /Provider portal and under More, use the Customize Portal.
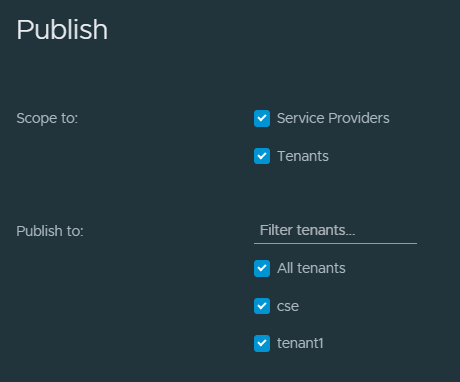
And then publish the plugin to all/select Tenants.
Enable Tenant access to CSE
Note that CSE supports both TKGm and native k8s runtimes at the same time, and you can provision both with VCD.
TKG related options won’t show up in vcd-cli, unless explicitly enabled. To enable TKG options in vcd-cli, set the following environment variable
export CSE_TKG_M_ENABLED=TrueFirst login to VCD using the vcd cli
vcd login vcd.vmwire.com system administrator --password Vmware1! -w -iCheck for registered extensions
vcd system extension listRegister the cse extension
vcd system extension create cse cse cse vcdext '/api/cse, /api/cse/.*, /api/cse/.*/.*'Enable a tenant to use TKGm with CSE. The command below enables CSE for another organization named tenant1 and for the org VDC named tenant1-vdc.
vcd cse ovdc enable tenant1-vdc -o tenant1 --tkgYou should see the following output.
OVDC Update: Updating OVDC placement policies
task: 900ea6f4-e08b-4d29-ae24-2f604e50276e, Operation success, result: success
To enable a tenant to use native upstream k8s with CSE. Use the following command.
vcd cse ovdc enable --native --org tenant1 tenant1-vdcEnable Global Roles to use CSE or Configure Rights Bundles
The quickest way to get CSE working is to add the relevant rights to the Organization Administrator role. You can create a custom rights bundle and create a custom role for the k8s admin tenant persona if you like. I won’t cover that in this post.
Log in as the /Provider and go to the Administration menu and click on Global Roles on the left.

Edit the Organization Administrator role and scroll all the way down to the bottom and click both the View 8/8 and Manage 12/12, then Save.

Starting CSE
First lets check our installation
cse check encrypted-config.yaml --check-installRun CSE from command line
# Run server in foreground
cse run --config config.yaml

# Run server in background
nohup cse run --config config.yaml > nohup.out 2>&1 &
You can also run CSE as a service, please refer to this link if you prefer to do this instead.
Deploying a TKG cluster as a Tenant
Congratulations, now we’re ready to deploy a k8s cluster.
Log into VCD as a tenant and go to More, Kubernetes Container Clusters.
Click on New and you should now see an option to deploy a Native Kubernetes runtime or a VMware Tanzu Kubernetes Grid runtime. VCD also supports vSphere with Tanzu as well (which is not installed as part of this article). You’ll see a third tile here if you did enable vSphere with Tanzu (TKGs).
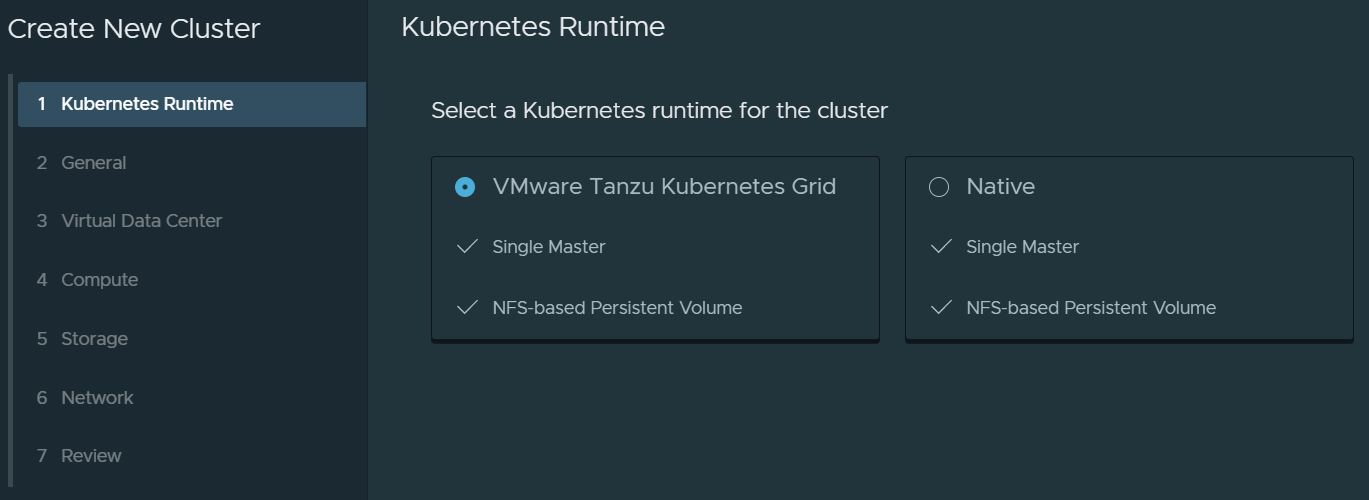
On the next page, give the k8s cluster a name, select a runtime and optionally paste in your SSH public key for easier access to the Kubernetes cluster later.
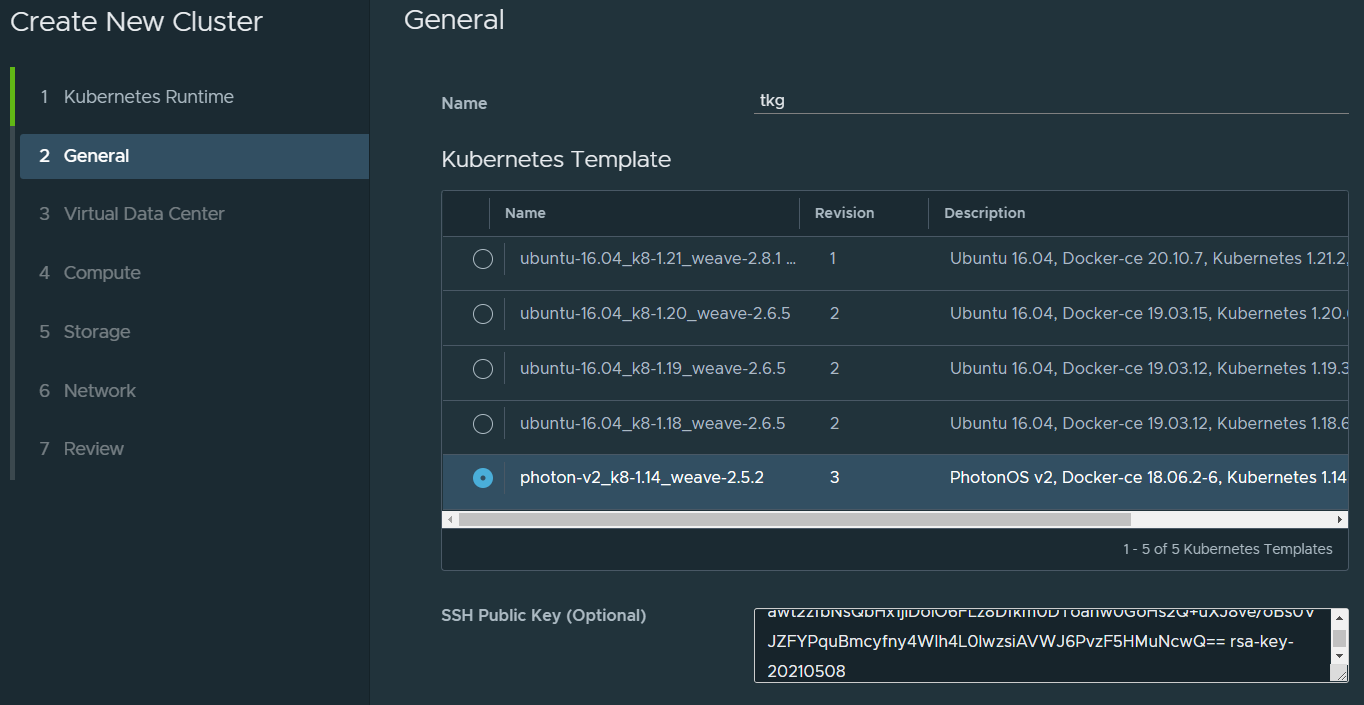
Proceed as following screenshots.
CSE 3.0.4 does not support multi-master, i.e., more than one node for the Control Plane. This is coming in a future release.

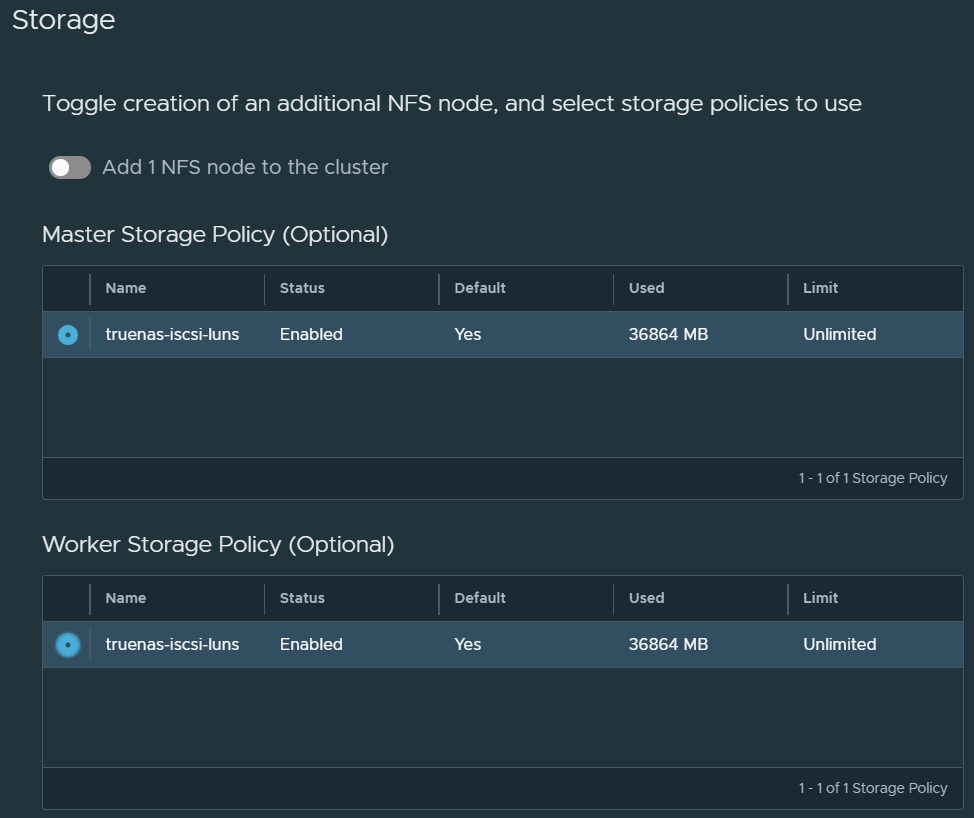
Next select the storage policies that the Control Plane node and the Worker node(s) will be deployed into. You can also opt to deploy another node to use as persistent volumes through NFS.
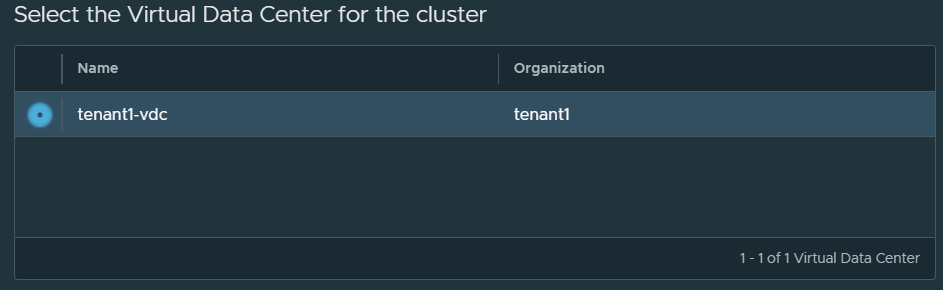
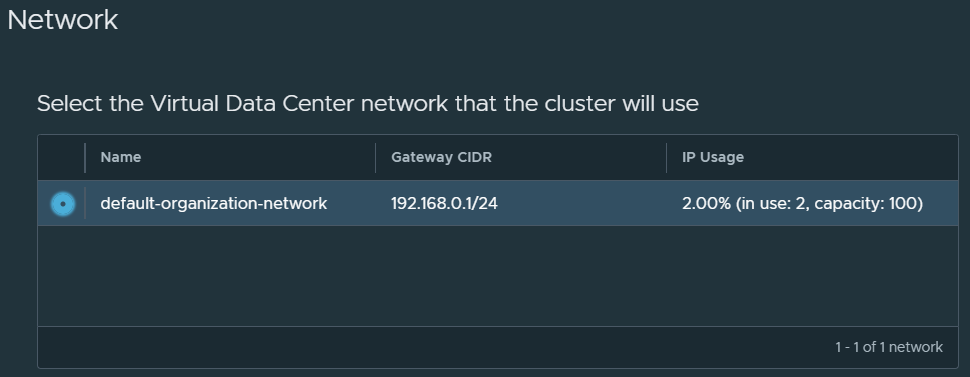
Select the network.
Review the final page and click on Finish. CSE will now deploy the TKG cluster for you and it will be ready once all nodes are up and running. You’ll see the following once ready.

Which you can also see with this command in CSE
vcd cse cluster list
[root@cse .vcd-cli]# vcd cse cluster list
Name    Org      Owner          VDC          K8s Runtime    K8s Version       Status
------  -------  -------------  -----------  -------------  ----------------  ----------------
tkg     tenant1  tenant1-admin  tenant1-vdc  native         upstream 1.14.10  CREATE:SUCCEEDED
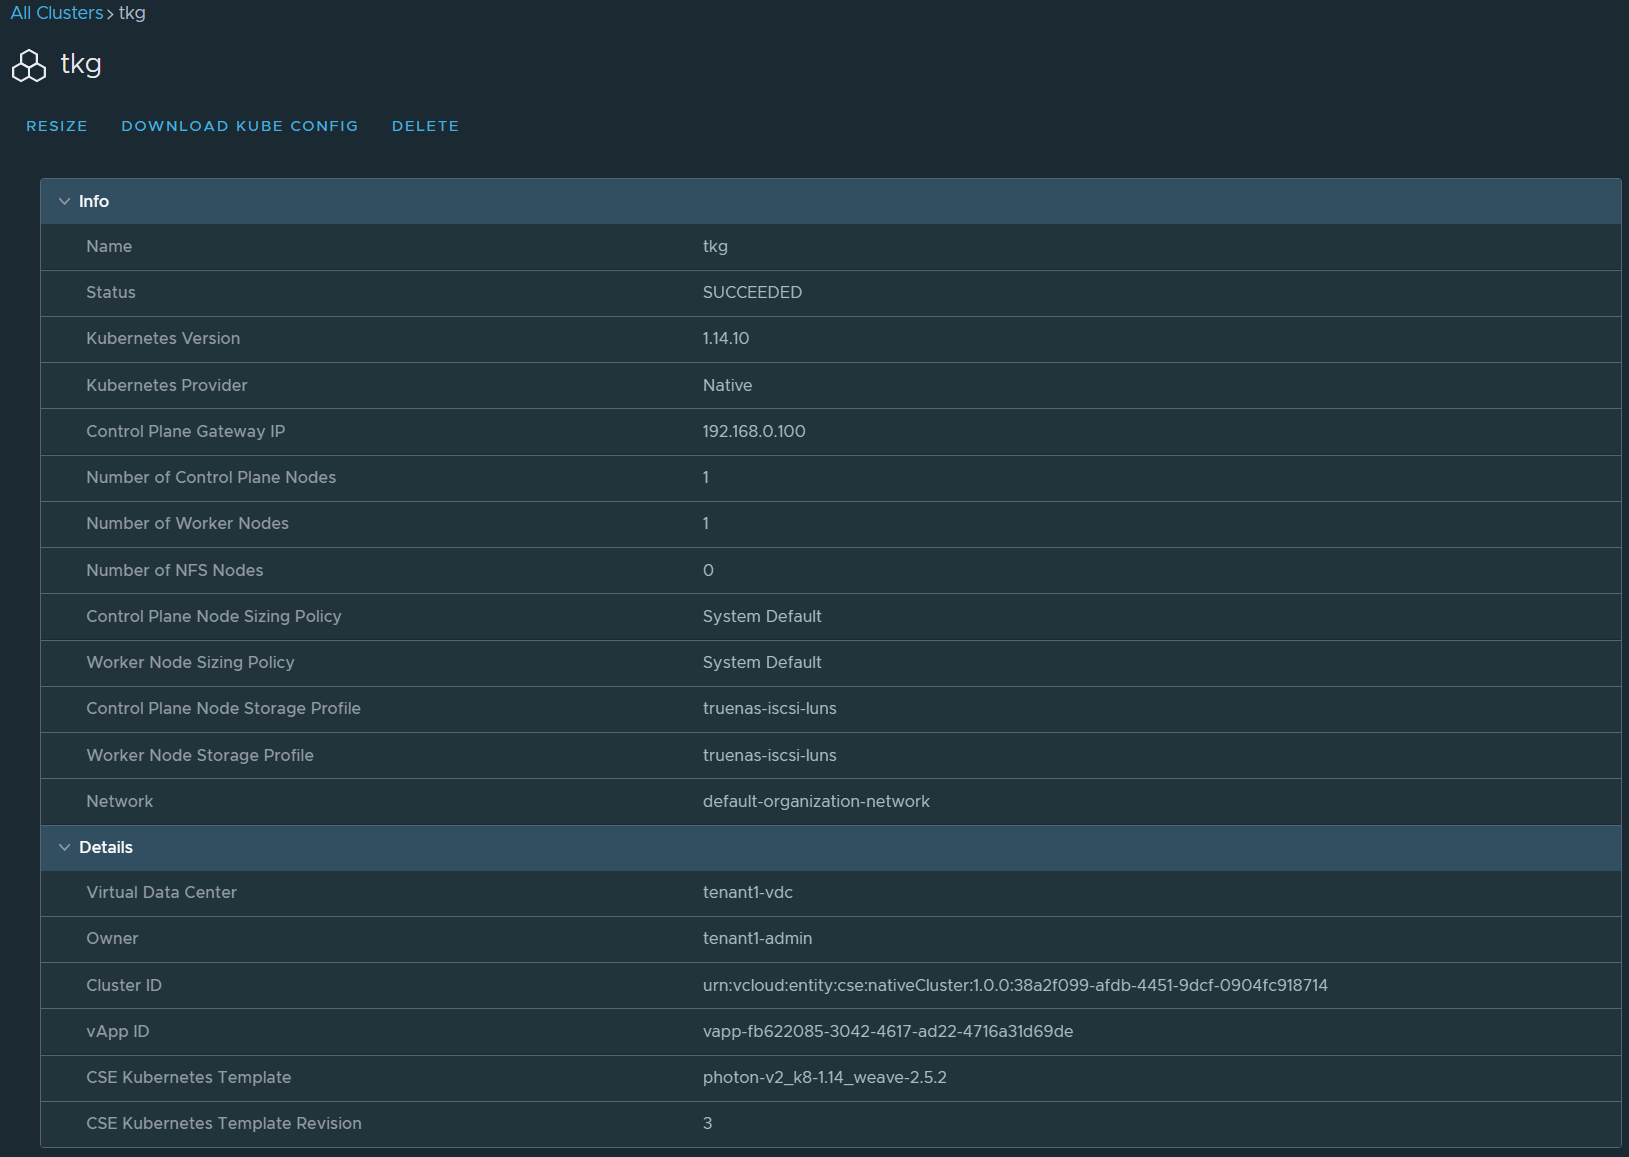
Only thing left to do is download the Kube Config file and login with kubectl.
Useful commands
# Login to VCD
vcd login vcd.vmwire.com system administrator --password Vmware1! -w -i

# Register CSE extension with VCD
vcd system extension create cse cse cse vcdext '/api/cse, /api/cse/.*, /api/cse/.*/.*'

# List VCD extentions
vcd system extension list

# Describe CSE extension
vcd system extension info cse

# Describe CSE configuration
vcd cse system info

# List organization VDCs with CSE enabled
vcd cse ovdc list

# Enable CSE for org VDC
vcd cse ovdc enable --native --org tenant1 tenant1-vdc

# Look at CSE logs
cat /root/.cse-logs/cse-server-info.log, /root/.cse-logs/cse-server-debug.log

# Tail the CSE logs
tail -f /root/.cse-logs/cse-server-info.log, /root/.cse-logs/cse-server-debug.log

# Upgrading CSE or changing config file parameters, e.g., changing verify_ssl certs to true, note the skip-template-creation which will save you a lot of time
cse upgrade --config <config_file> --skip-template-creation

# Get infor for a cluster named tkg
vcd cse cluster info tkg

# Login as a tenant user
vcd login vcd.vmwire.com tenant1 tenant1-admin -i -w

# Deploy tkg cluster using the command line
vcd cse cluster apply tkg7.yaml

2 thoughts on “Install Guide – Container Service Extension 3.0.4 with VMware Cloud Director for Tanzu Kubernetes Grid”