Avi DNS can host the names and IP addresses of the virtual services configured in Avi Vantage. Avi Vantage serves as DNS provider for the hosted virtual services.
Avi DNS runs a virtual service with System-DNS application profile type and a network profile using per-packet load balancing.
An Avi Ingress service is created in Kubernetes, Avi will automatically create the DNS record for the ingress service.
For example, creating an ingress for nginx.tkg-workload1.vmwire.com will automatically be routed to the nginx pod by the Avi DNS Provider.
---
apiVersion: networking.k8s.io/v1
kind: Ingress
metadata:
  name: nginx-ingress
  annotations:
    ako.vmware.com/enable-tls: "true"
  labels:
    app: nginx
spec:
  ingressClassName: aviingressclass-tkg-workload-vip
  rules:
    - host: "nginx.tkg-workload1.vmwire.com"
      http:
        paths:
          - pathType: Prefix
            path: /
            backend:
              service:
                name: nginx-service
                port:
                  number: 80
---
apiVersion: v1
kind: Service
metadata:
  name: nginx-service
  namespace: default
  labels:
spec:
  selector:
    app: nginx
  ports:
    - port: 80
      targetPort: 80
      protocol: TCP
  type: ClusterIP
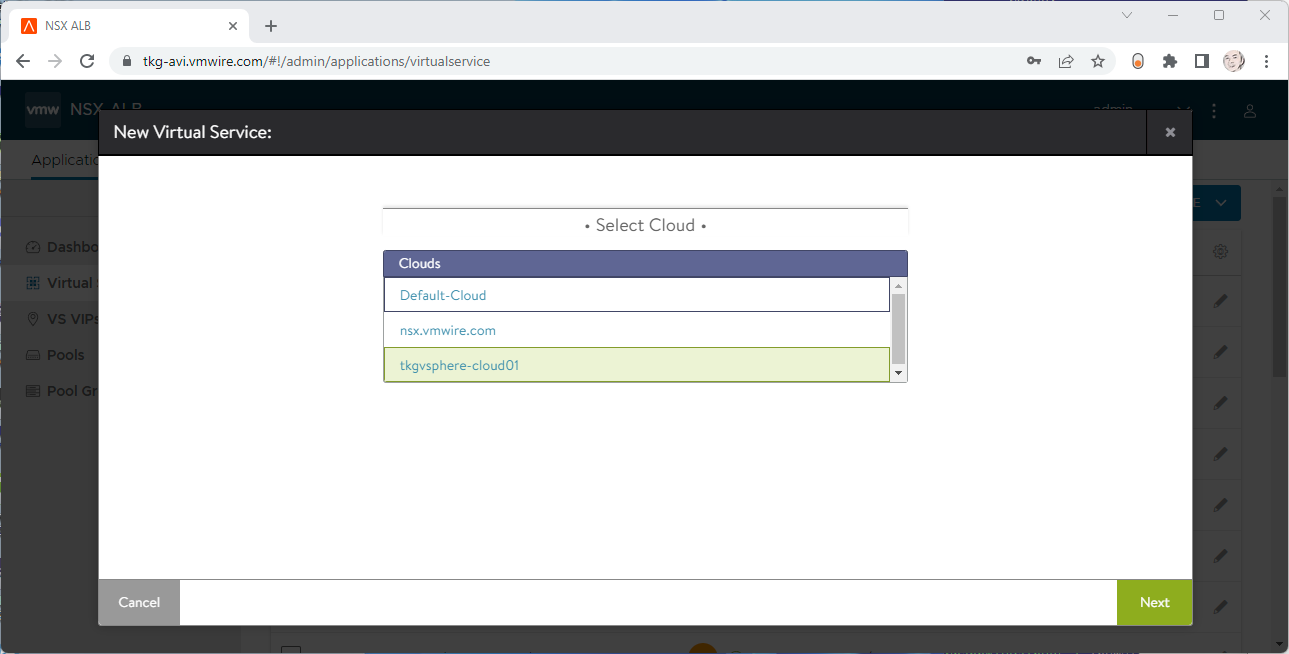
Step 1 – Create a virtual service for DNS
Click on Applications | Virtual Services | Create Virtual Service | Advanced Setup

Select the Cloud to create the DNS virtual service in.
Under Application Profile, select System DNS.
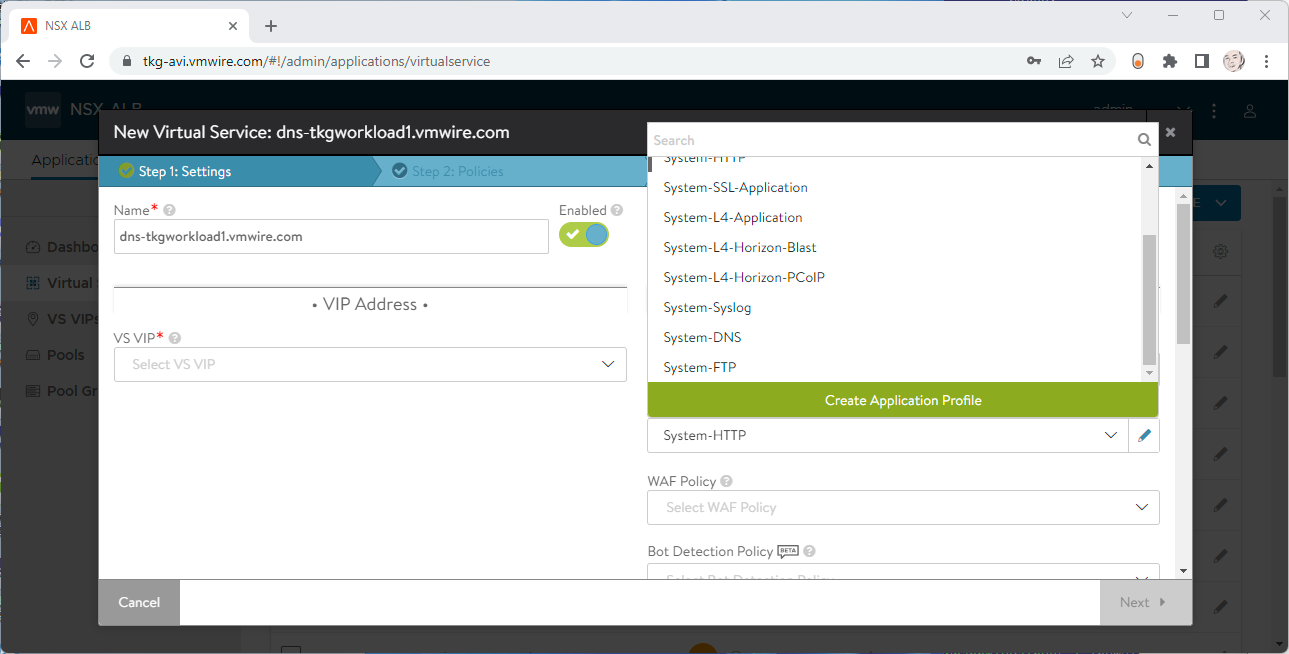
Under VS VIP, click on Create VS VIP.
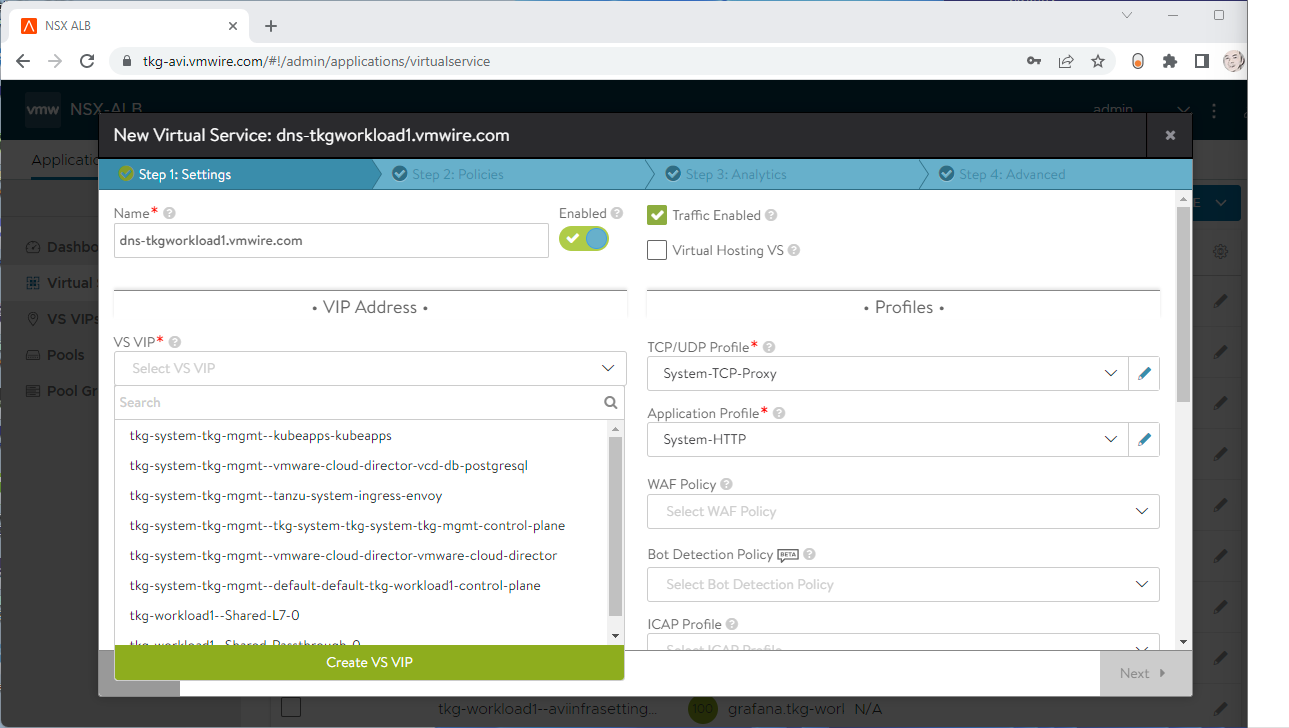
Press the ADD button under VIPs.
Give the service a name, select a VIP Address Allocation Network, IPv4 Subnet and Placement Network. Don’t set anything for DNS or RBAC.
Then press Save a few times to complete the wizard.

Goto the Advanced tab and choose a Service Engine Group for the DNS service to use.
Press Save to complete the virtual service setup.
Step 2- Enable DNS Service for Avi
Navigate to the Administration tab and select the DNS Virtual Service in the drop-down menu.

Step 3- Edit the default DNS Profile
Navigate to the Templates tab and edit the default DNS profile, the type is Avi Vantage DNS.
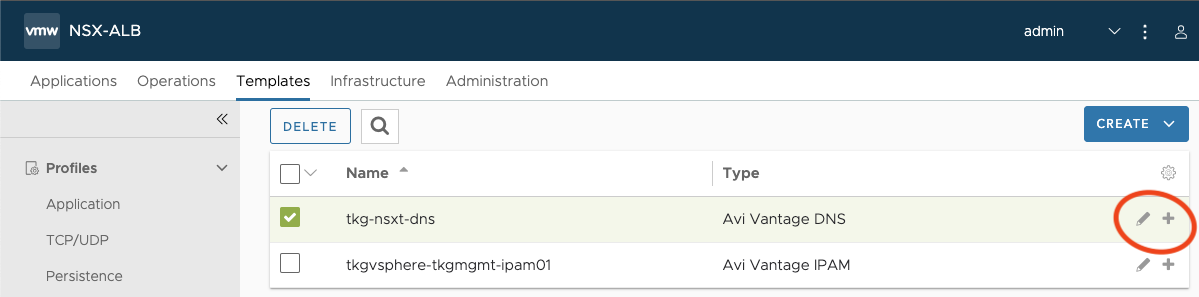
Under DNS Service Domains, add in the domain that you will be delegated by the Avi DNS Service. Then press Save.
Step 4- Edit the default DNS Profile
Navigate to the Infrastructure tab and edit the cloud that you want to enable for Avi DNS.
Click on the IPAM/DNS button at the top and it should take you to that section.
Make sure that the DNS profile is selected under DNS Profile.

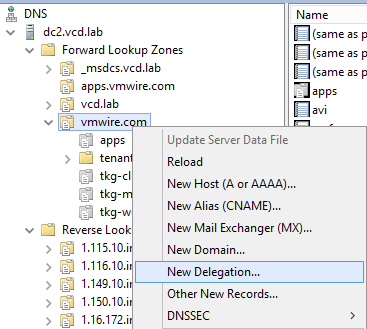
Step 5- Add the Avi DNS Service as a delegated domain in DNS
Find out the IP address of the Avi DNS virtual service, mine is 172.16.4.67.
You can identify it by going to Applications | Virtual Services.

I use Microsoft DNS Services, so using DNS Manager for the DNS Delegation. I want to use *.tkg-workload1.vmwire.com with Avi Ingress, so to delegate the tkg-workload1 domain with Microsoft DNS Services we create a new Delegation.

Enter the IP address for the FQDN.
Thats it!
You’re now ready for Avi to manage DNS records for the sub domain delegation.
